Maintenance Series Vol.1: Inside the Schaller M6
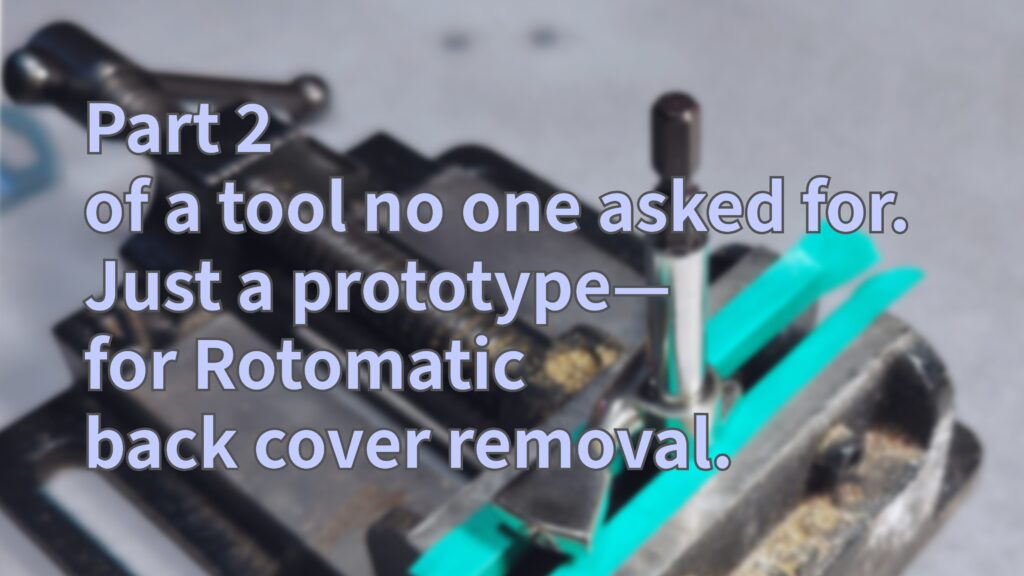
Side Note: Prototyping a Custom Tool for Rotomatic Tuners Maintenance
This is Part 2 of the unofficial spin-off to the “Complete Rotomatic Peg Maintenance Guide.”
※ Main article: [Reassembly Edition] Complete Rotomatic Peg Maintenance Guide

It began as a way to tidy up the formatting of the “Reassembly Edition” by prototyping a dedicated striking tool.
Two versions were created: one as an extension of the back cover removal process (hereafter: dedicated striker), and one using a simple plastic hammer (hereafter: simple hammer).
Each method is introduced in a separate article.
Though referred to as a custom tool, it’s simply a glue stick paired with a bit driver.
Both are prototypes and remain untested.
The intent was to create a soft-impact plastic hammer—not something built for strength.
Since impact may damage ratchet joints or connection points, there’s room for selection and improvement.
From hands-on impressions, both versions seem potentially usable for back cover removal and may allow for future adaptation.
This article is not intended for personal use, and I don’t plan to expand on it.
Still, if you ever find yourself in need, I hope the method stays somewhere in the back of your mind.
This article is a record written to tidy up the formatting.
What it introduces is merely a method—specifically, the prototyping of a striking tool and the use of glue as a material.
The process itself isn’t particularly complex and deals with auxiliary components.
If you’re not particular, almost anything will do.
Even failed attempts or broken tools can offer insight.
Please proceed at your own risk.
※Previous article: [Part 1] Dedicated Striker Prototype
Introduction
The previous “dedicated striker” was a derivative prototype designed for removing the back cover of Rotomatic pegs.
Its design was constrained by the fit between glue stick and socket, and limited by size.
This time, I’m introducing the “simple hammer” version.
The result is nearly the same, but the starting point is different: not a custom tool, but a general-purpose hammer.
The order of operations shifts slightly, and depending on how it’s applied, it could still function as a dedicated tool.
This “simple hammer” version doesn’t restrict purpose or socket size/shape, so the constraints are slightly loosened.
However, considering glue curing time, making something too large may result in voids and reduced strength.
If you need something larger than a socket, it’s probably safer to just buy a plastic hammer.
Because the method isn’t tied to a specific purpose, it’s more versatile.
Its simple structure also allows for broader material choices.
This is just enjoying unnecessary work—if nothing else, I hope you remember this as a “misuse of glue.”
Components: “Simple Hammer” Version
This second article introduces the “simple hammer” version.
Since the work continues from the previous article, the component selection was initially based on the dedicated striker’s purpose.
That said, I’d like to invite you to take a more relaxed view and imagine general-purpose alternatives, rather than narrowing the scope too much.
The components are as follows:
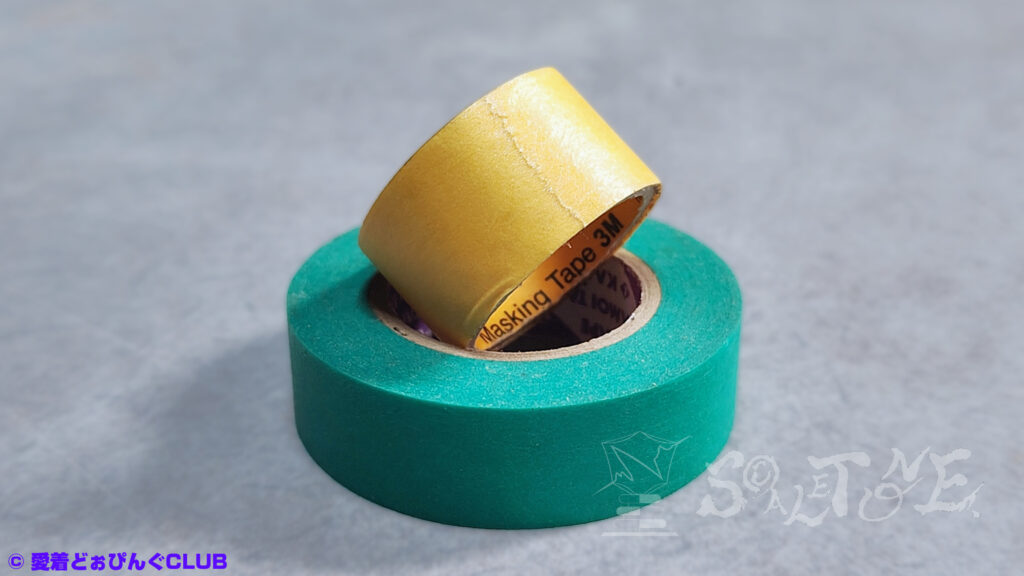
Glue Stick
Sized to match the glue gun being used.

Amazonでの検索結果:“グルースティック“
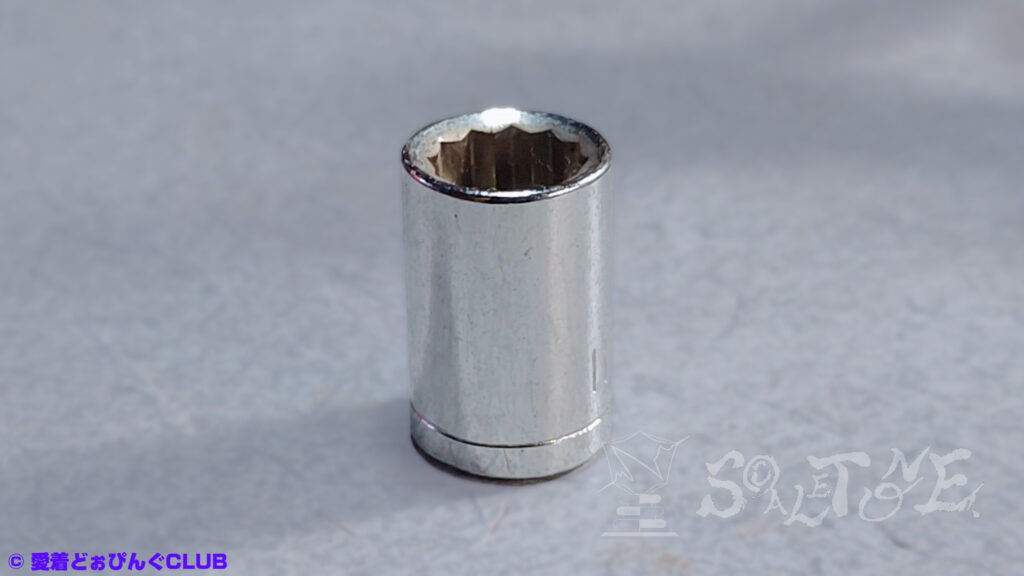
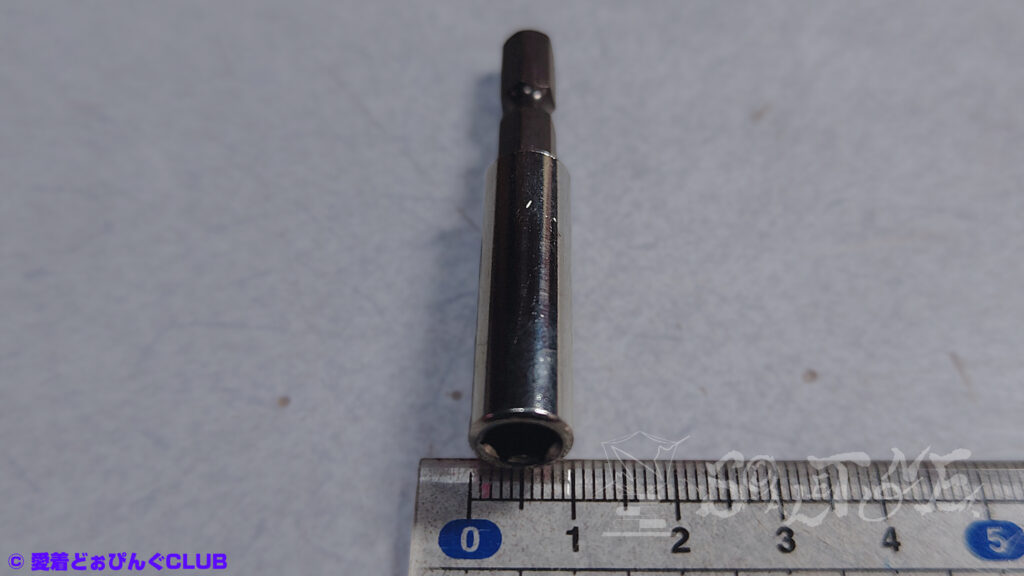
Socket
Carried over from the previous process, I simply chose an extension adapter that was on hand.
Had I considered “versatility” at the time, I might have made a different choice.
The bit driver used is a standard size, with a ratchet joint spec of 6.35mm (1/4 inch) hex shaft.
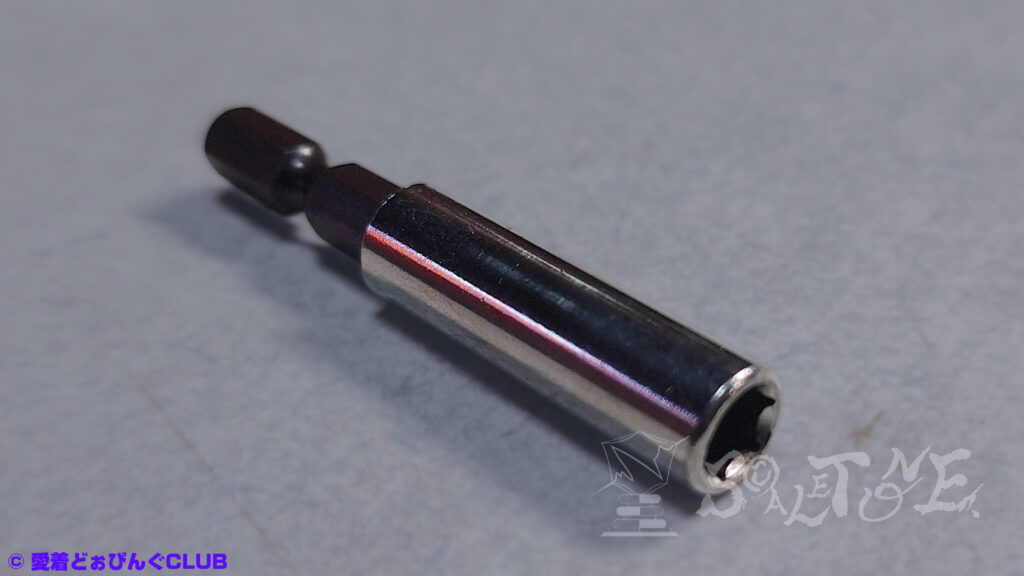
Assuming it will be struck with a hammer, the main concern is the strength of the joint between socket and shaft.
There’s no need to stick to the 6.35mm (1/4 inch) spec this time.
If available, a standalone socket from a socket wrench may be preferable.
There are limits, but size and shape constraints are somewhat relaxed.
The explanation may waver between “versatility” and “dedicated tool,” but I hope you’ll allow for some imaginative flexibility.
Ideally, the outer diameter of the socket should fall within the perimeter of the back cover and be close to its dimensions.
Tools
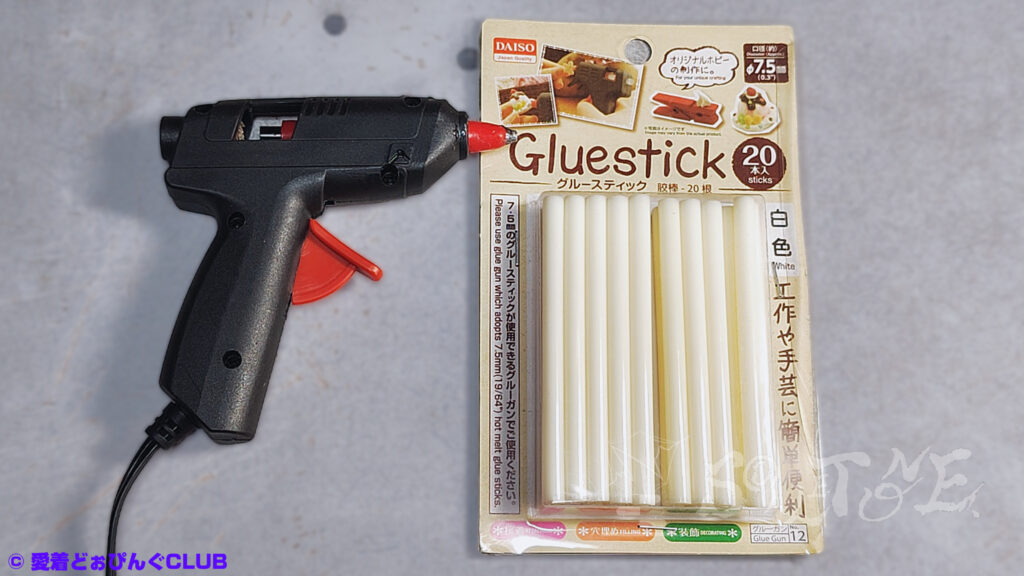
Glue Gun
Also known as “hot bond” or “hot melt.”
Amazonでの検索結果:“グルーガン 日本製“
Masking Tape
You can use the same type, but having two different widths is ideal.
Amazonで購入する:“マスキングテープ“
Flat Surface
A smooth, non-stick surface for shaping the glue.
In this case, I used an acrylic ruler.
Other helpful tools
standard items you might already have:
- Turbo lighter
- Utility knife
- Pen
- Vise
- Silicone lubricant spray (optional: lightly applied to prevent glue from sticking)
Amazonで購入する:“ボール盤バイス“
Step -1:Review | Using Glue & Removing the Back Cover (Imaginary)
※ This time, the turbo lighter isn’t used—this is just for reference.
First, clean and degrease the bonding surface using neutral detergent or alcohol-based wet wipes.
Use the heat from a turbo lighter to melt the glue stick, applying a generous amount to cover the entire back cover.
Press it vertically to ensure full contact.
※ Be careful not to expose it directly to flame.
Ideally, the glue should spread to the outer edge of the case.
As a guide for timing, when heat is applied, the glue begins to soften and take on a glossy, droplet-like appearance—similar to melting wax.
At this stage, the viscosity and adhesion balance well, making it easier to bond securely.
This part requires caution to avoid burns, but with a few trials adjusting the distance and heating time, you’ll quickly get a feel for it.
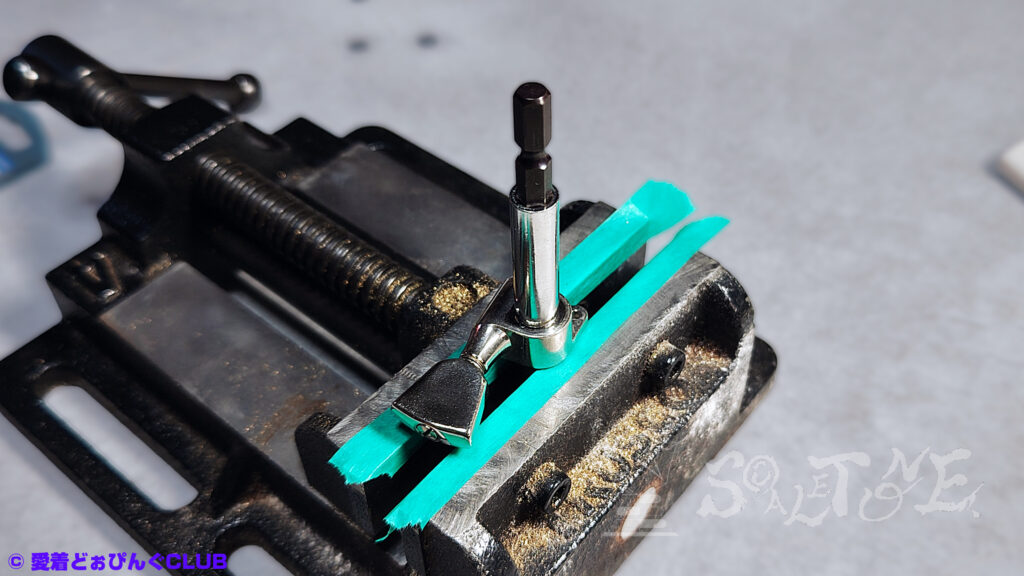
Step 1:Mold Frame
Now, let’s begin making the “simple hammer.”
In the images, I used different types of masking tape to make things easier to distinguish.
You can use the same type, but having two different widths makes the process smoother.

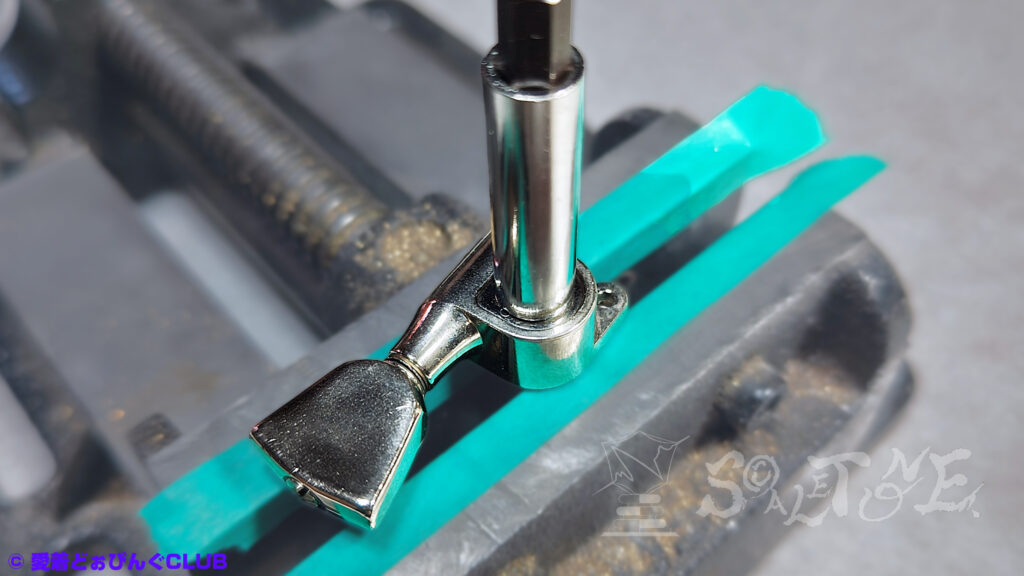
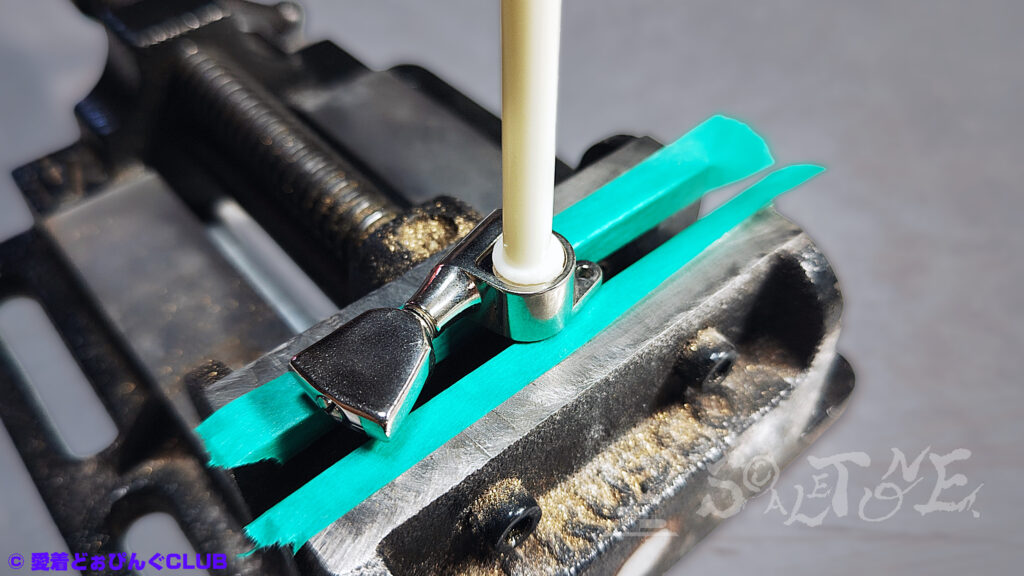
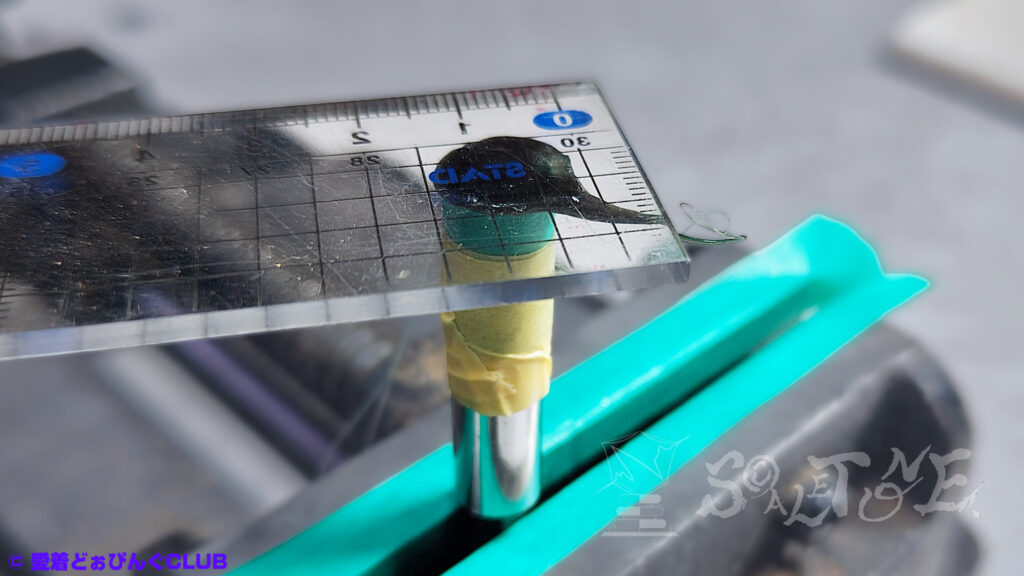
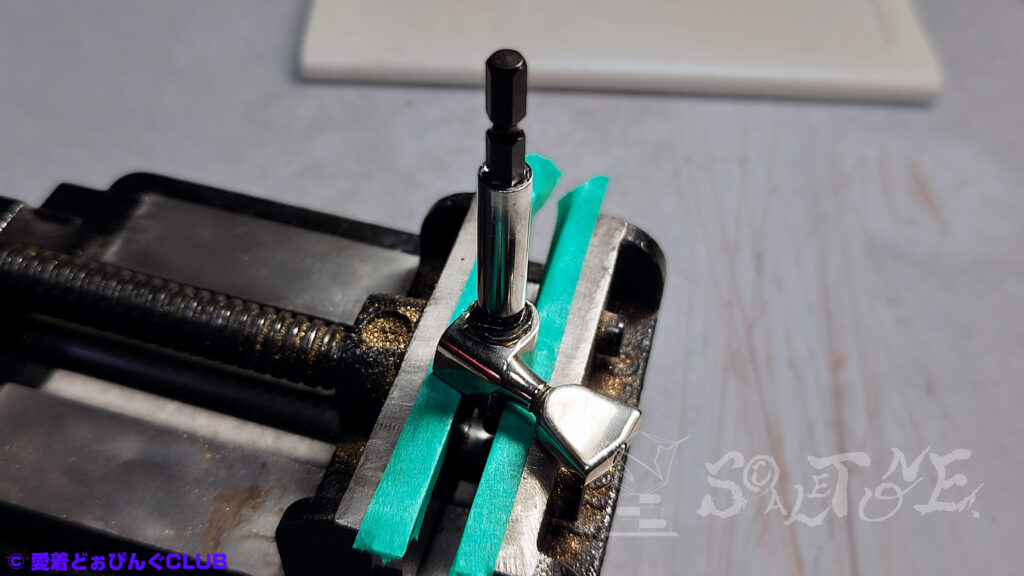
First, prepare two strips of masking tape, each long enough to wrap around the socket a few times.
Align them in parallel, offset by the height needed for the hammer’s cushion section, and stick the adhesive sides together.
If you have two widths of tape, the narrower one will form the “wall” of the cushion section.
(For reference, the green tape in the image is about 4mm wide.)
Step 2:Glue Stick + Socket
Align the edge of the masking tape with the rim of the socket.
Then, wrap the tape around the socket so that the adhesive side of the “wall” tape faces outward.
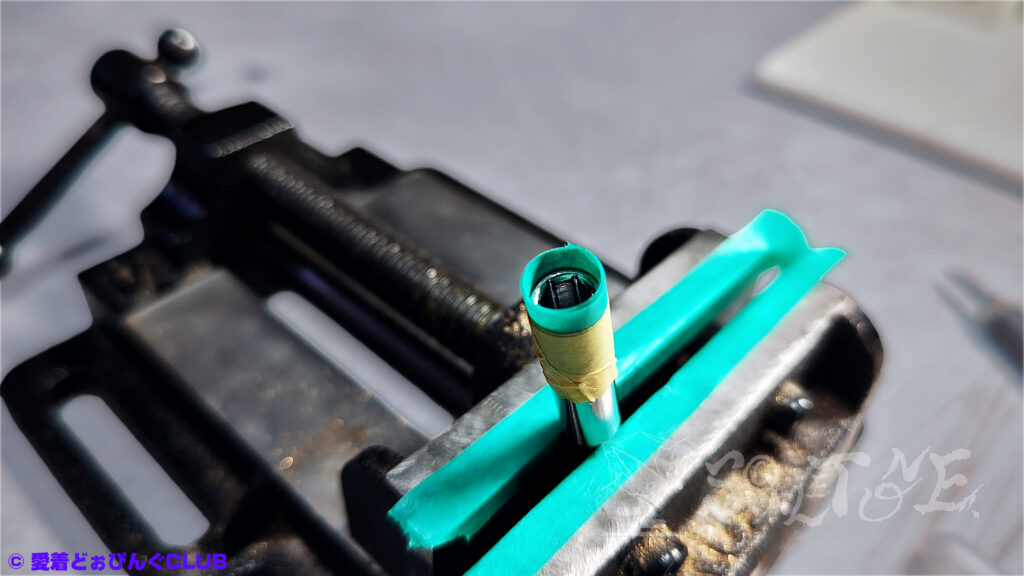
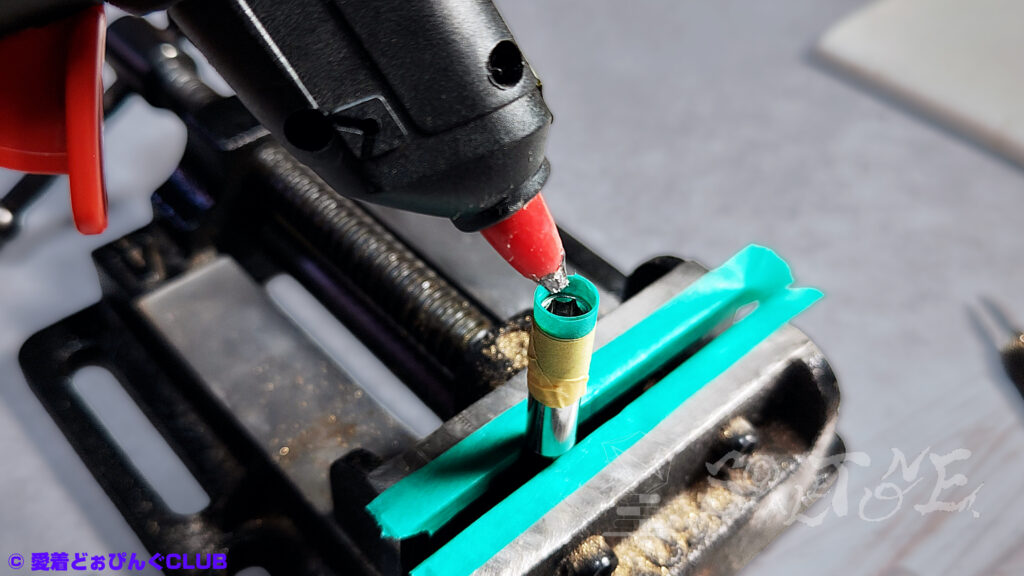
Step 3:Injection
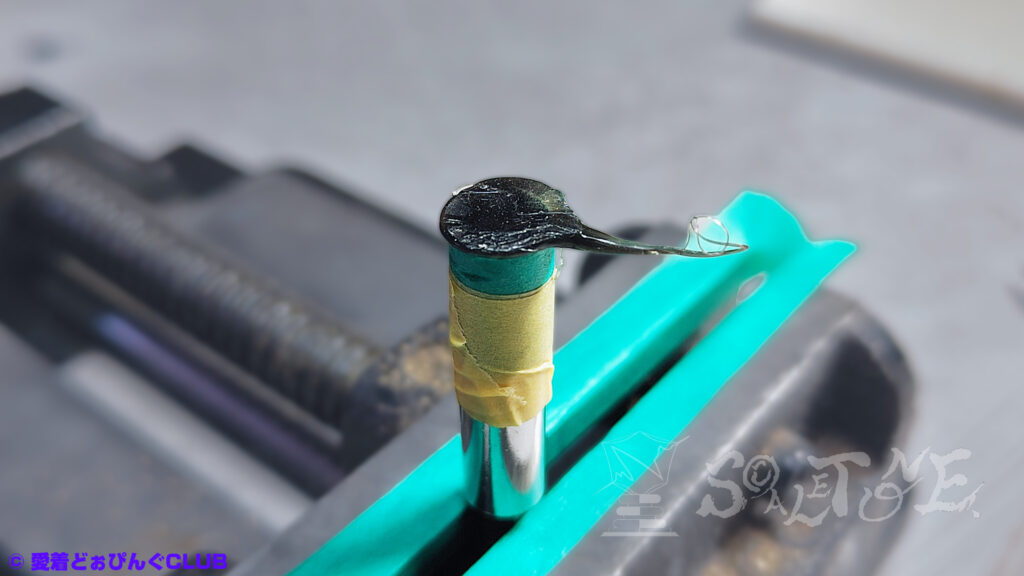
Using a glue gun, inject glue deep into the cavity to ensure full coverage.
※ This is a prototype stage—safety and durability have not been verified.
Step 4:Shaping
Once filled to the top, use a smooth, flat surface to shape the striking face.
Since glue is an adhesive, be sure to use a material it won’t bond with.
Wait until it cools and hardens.
If the surface seems likely to stick, you can spray silicone lubricant beforehand, or apply a thin layer of petroleum jelly or lip balm to make removal easier.
※ Effectiveness may vary depending on the material and amount used—adjust as needed.
As an alternative, you can shape it directly against the target object instead of a flat board.
This will give you a form closer to a “dedicated striker.”
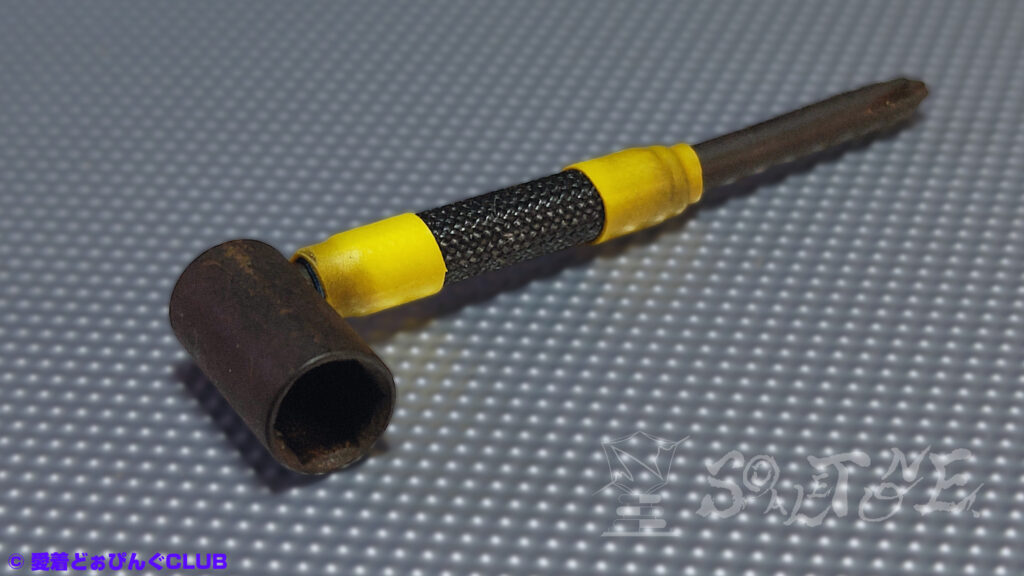
Step 5:Completion
Once the glue has cooled and hardened, remove the masking tape and check the surface.
If the glue has overflowed or formed ridges, trim it with a utility knife.
This completes the prototype of the “simple hammer.”
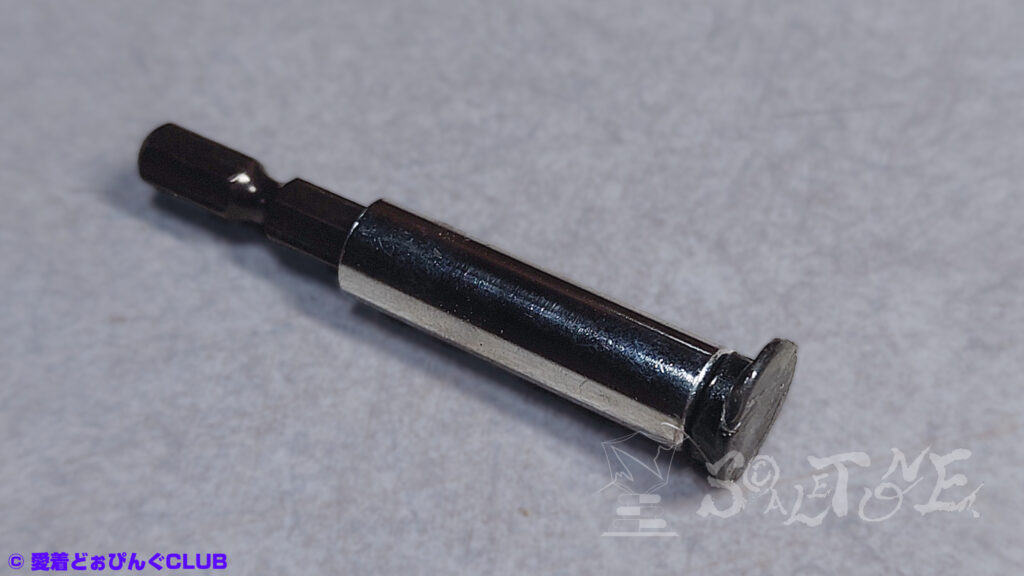
Depending on how it’s shaped, it may also function as a dedicated striker.
However, if the glue is too soft or the socket too heavy, it may not be suitable for impact use.
In that case, consider switching to a plastic hammer or revising the structure.
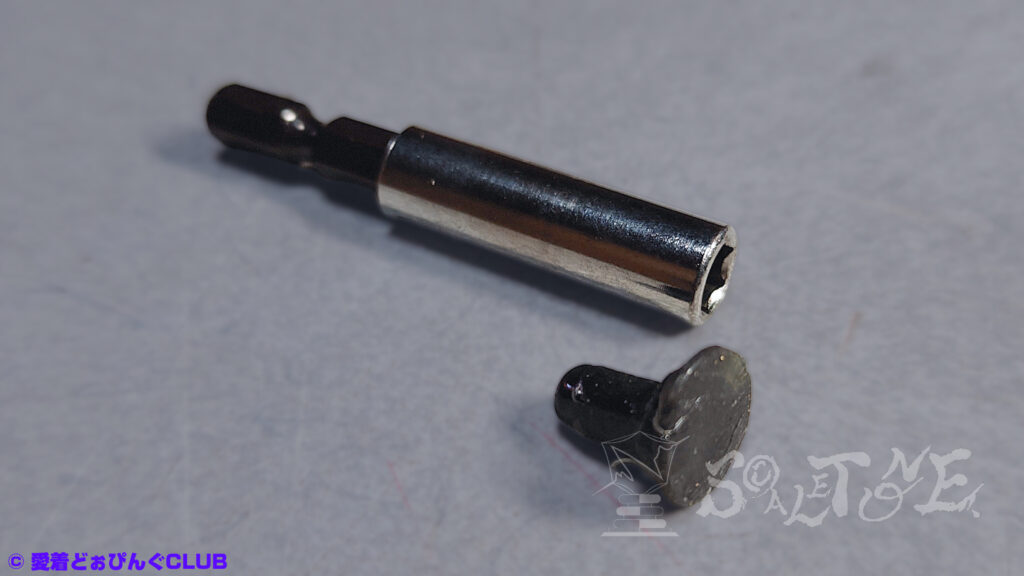
Since the socket is designed to be removable and replaceable, you can expand its variations through further customization.
By heating the socket itself, it may be possible to increase its diameter—but safety has not been verified, and the process may involve potential hazards.
Another option is to extend the cushion section and apply heat with a turbo lighter, as shown in Part 1.
This article is not a recommendation, but a record of method.
Please treat it as a reference only.
ScALETONE.’s Note:Final Thoughts
That wraps up this little corner of “Let’s Play with Glue Sticks.”
Thank you for sticking with me to the end.
With this method, even that truss rod box wrench—familiar to guitarists and probably gathering dust in the toolbox—might finally get its moment in the sun.
Then again, that would make the use case even more specific.
It just looked like it would be easy to hit with, so I said it.
Still, it’s undeniably a repurposed use.
If we weren’t bound by the “glue stick” constraint, there would surely be better materials.
I don’t even know if this will ever be useful, or if it’s helpful to anyone.
In the end, what was I trying to do?
This is what everyday life looks like on this site.
- Return to the【Related Tools List】for this article.
Safety and durability have not been verified, and the process may involve risks.
Please treat this as a reference only, and adjust according to your own environment.
Related Articles
※Part 1: Prototype Record of the Dedicated Striker
※Main Article: “Reassembly Edition” — Complete Maintenance Guide for Rotomatic Pegs