
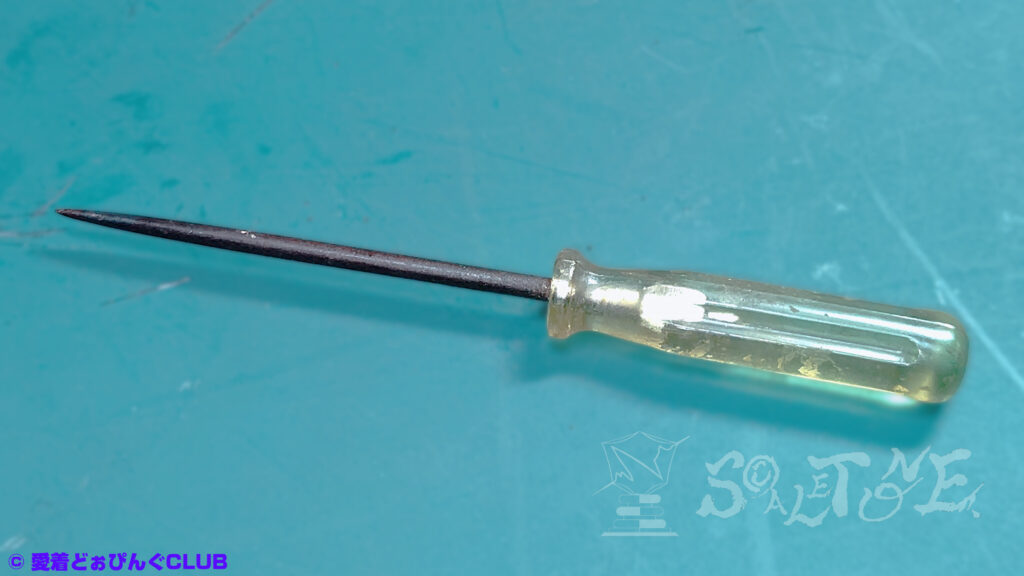
Maintenance Series Vol.1: Inside the Schaller M6
Rotomatic Disassembly Series – Part 1: Disassembly
In this new series, we take on the overhaul and maintenance of Rotomatic-style tuning pegs—a counterpart to the classic Kluson Vintage-style.
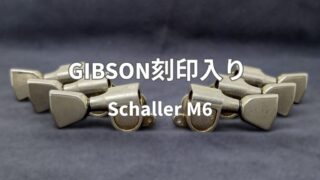
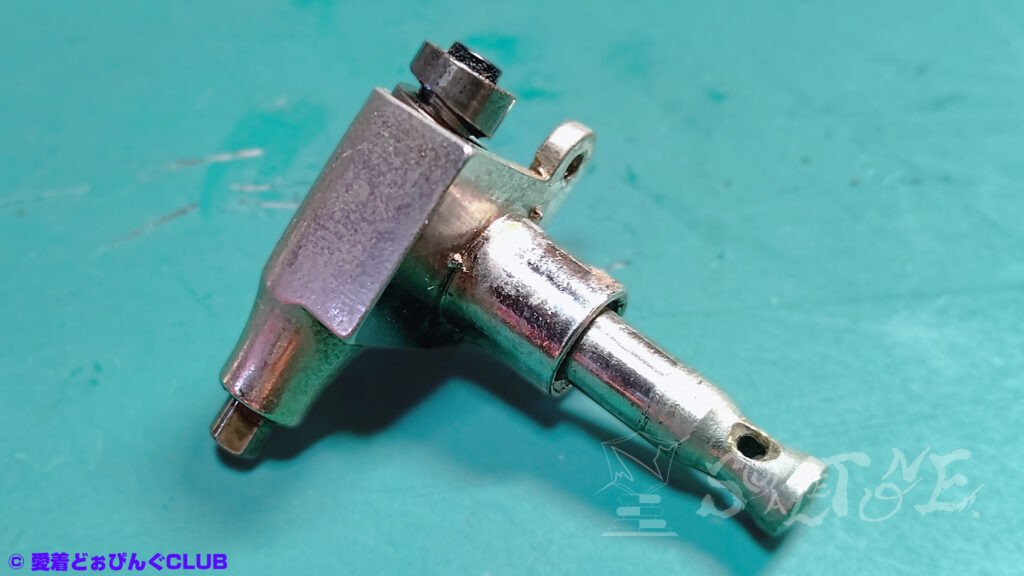
Our subject: the Schaller M6, a staple in the world of Rotomatic tuners.
This series will walk through the following steps:
- Disassembly
- Cleaning
- Polishing
- Re-greasing and Reassembly
Each step will be covered in four separate entries.
Part 1: Disassembly
This first entry focuses on the disassembly process, including:
- Step-by-step breakdown
- Tools used
- Key precautions
- A checklist-style summary


- Introduction
- Step 1:Removing the Peg Button Screw
- Step 2:Removing the Button and Washers
- Step 3:Removing the Shaft
- Removing the Back Cover
- Step 4:Removing the Back Cover
- Step 5:Inspecting the Grease
- Step 6:Removing Old Grease
- Step 7:Inspecting for Scratches
- Step 8:Removing the String Post
- Step 9:Checking for Gaskets
- Part Count – Rotomatic Pegs
- Rotomatic Peg Disassembly Checklist (Example: Schaller M6)
- Tool List – Disassembly
- ScALETONE’s Note:Next Time
Introduction
Rotomatic-style tuners, including the Schaller M6, are characterized by their sealed back covers.
Maintenance typically requires a full overhaul, and opening the back cover demands a bit of ingenuity.
This guide shares methods for disassembling without damaging the exterior, highlights internal structural checkpoints, and offers tips to prevent part loss—all accompanied by images.
Understanding the tuner’s internal structure is key to smooth cleaning and reassembly later.
Please note: this is a personal maintenance log, not a recommendation. Proceed at your own discretion.
Let’s begin—with the motto: Don’t force it.
※ Exact part names may vary; thank you for your understanding.
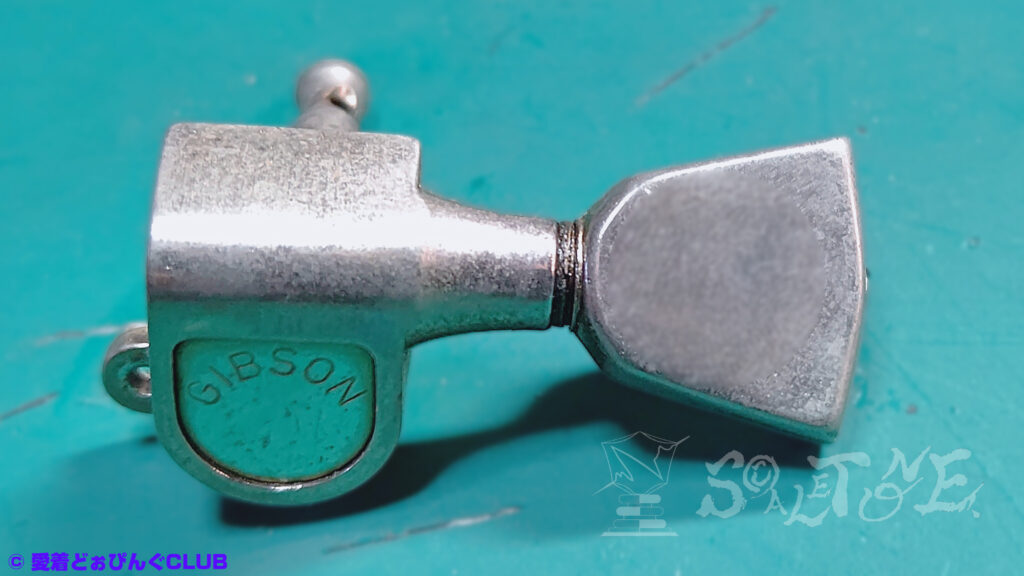
Step 1:Removing the Peg Button Screw
Start by unscrewing the peg button using a screwdriver.
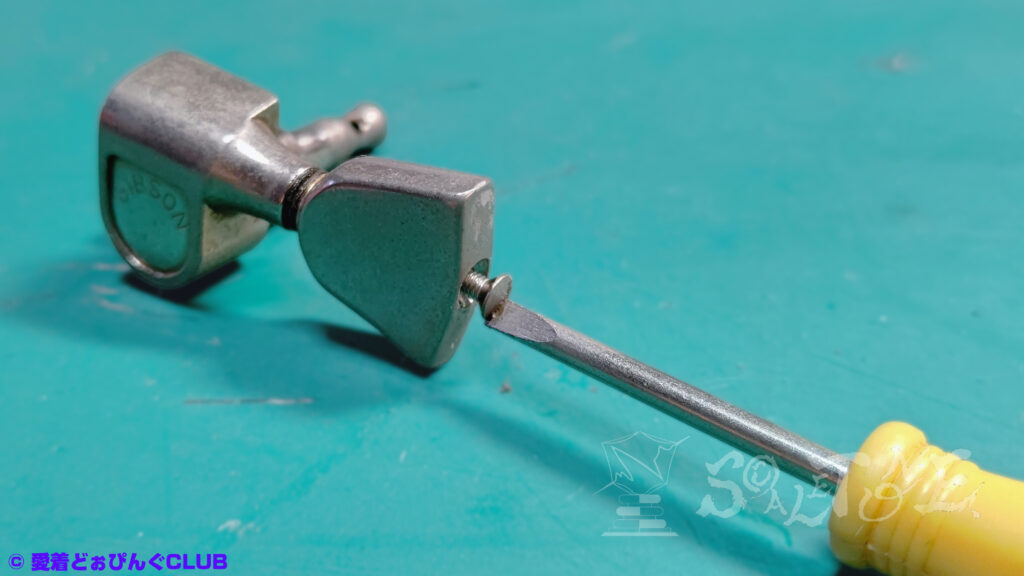
This screw appears to play a minor role in torque adjustment.
Step 2:Removing the Button and Washers
Once the button is removed from the shaft, you’ll find a set of washers underneath.
※ For reference: this blog uses the following terminology—
- “Peg” for the machine head
- “Shaft” for the peg shaft with the button
- “Post” for the string post
- “Gear” for the worm wheel at the base of the post
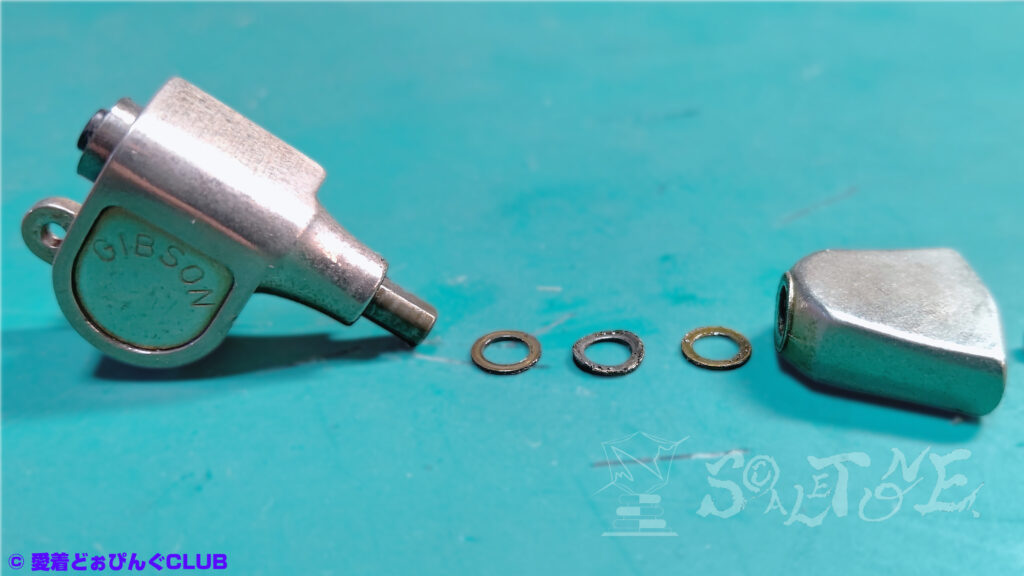
In this unit, the washer set consisted of:
- Two gold-colored washers (likely identical)
- One silver spring washer
※ Depending on the year, some washers may be plastic.
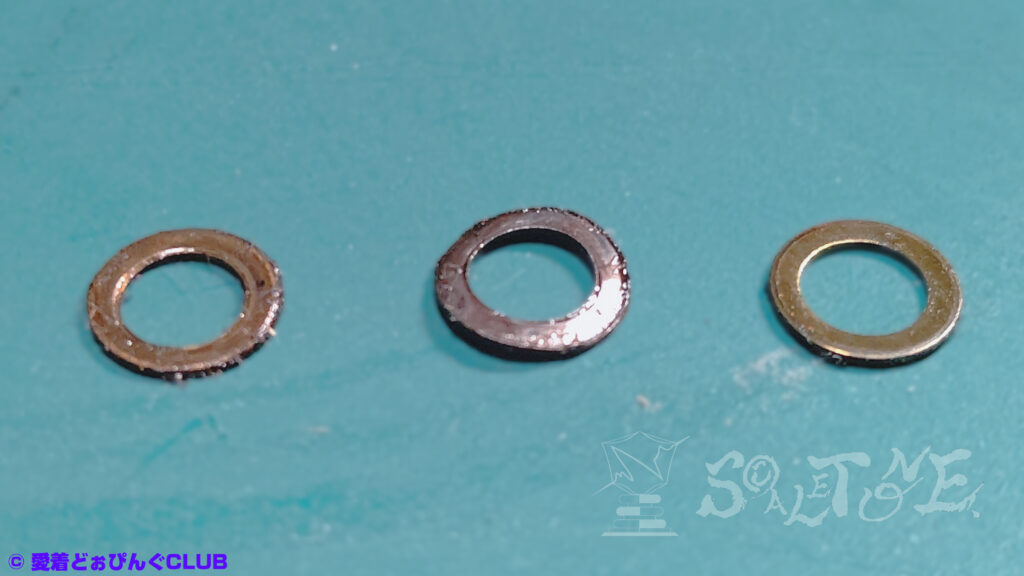
The key detail: the spring washer is sandwiched between the two gold ones.
To avoid losing parts, store them separately and securely.
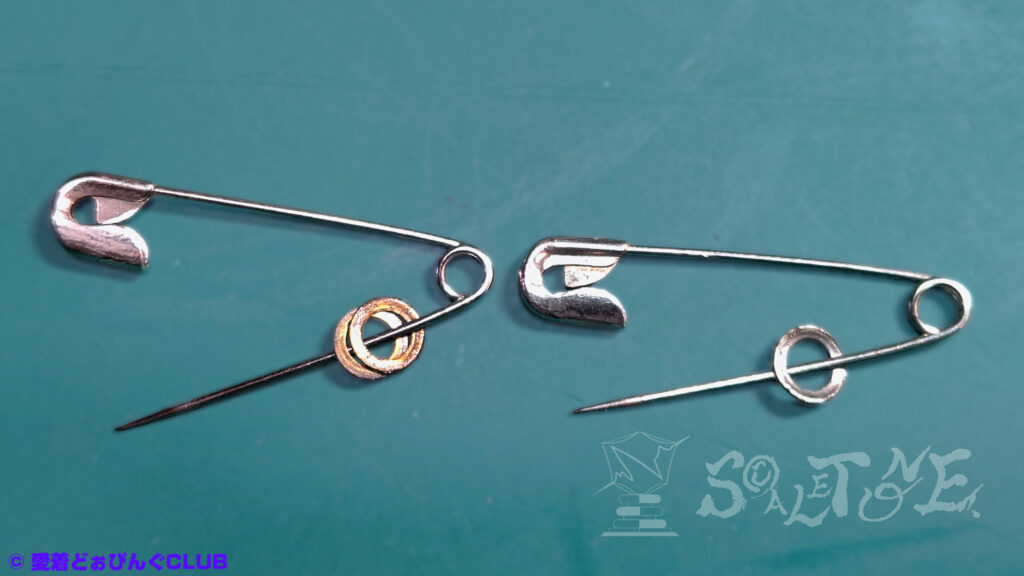
I grouped the gold washers together on safety pins, assuming they were identical.
But in hindsight, it might’ve been better to label and store them individually to avoid mix-ups.
※ I forgot to note the orientation of the spring washer—please check before removing.
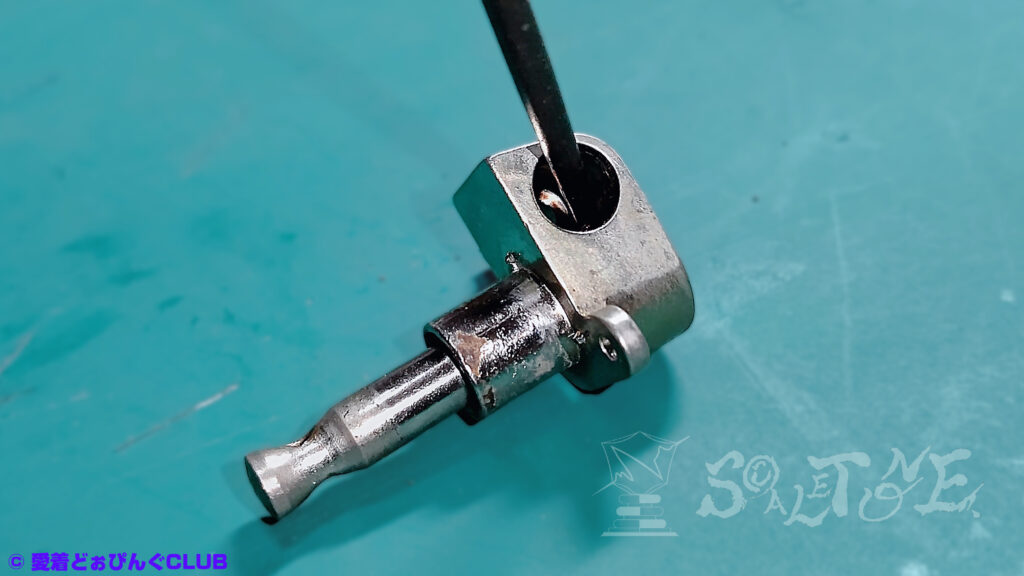
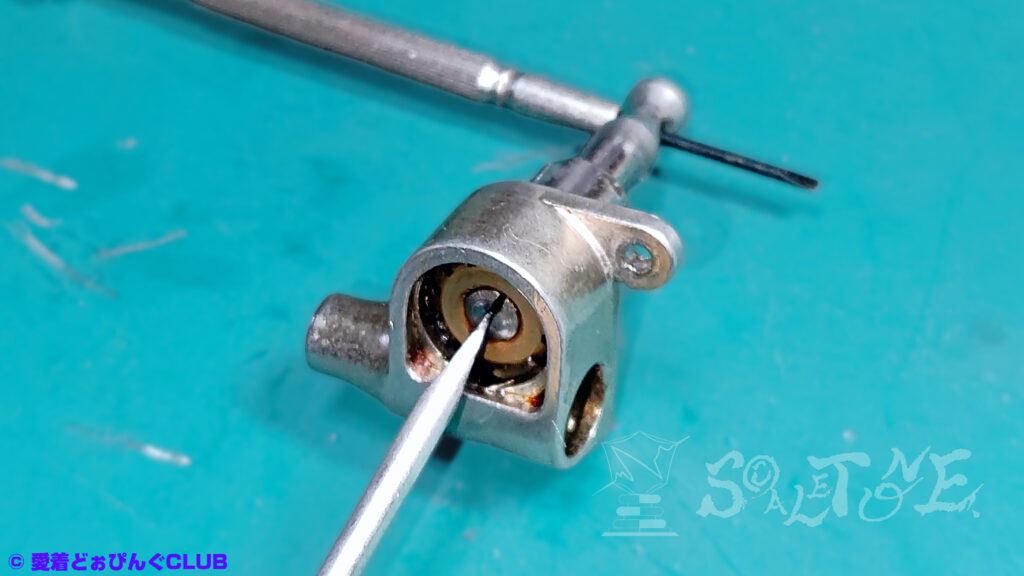
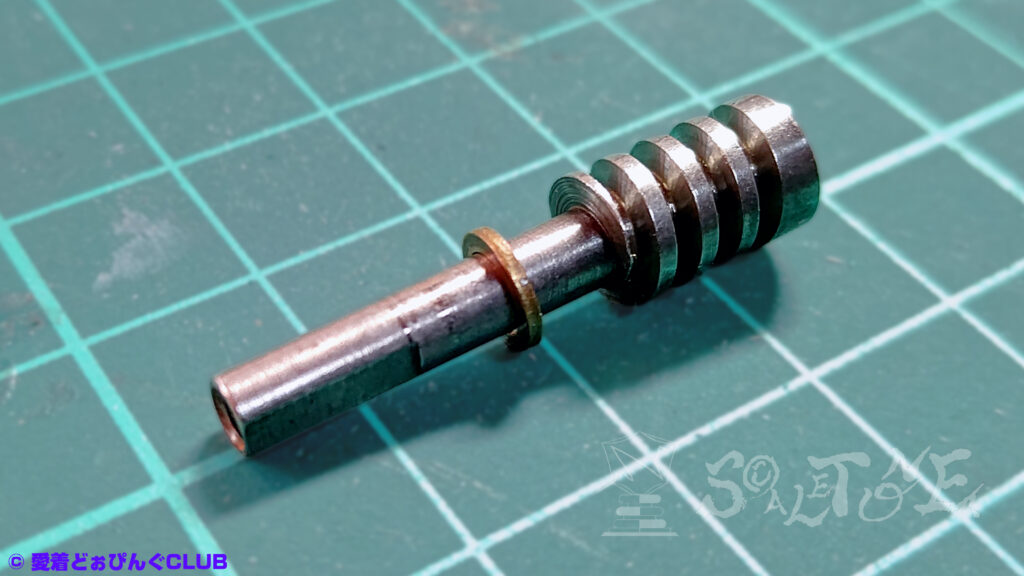
Step 3:Removing the Shaft
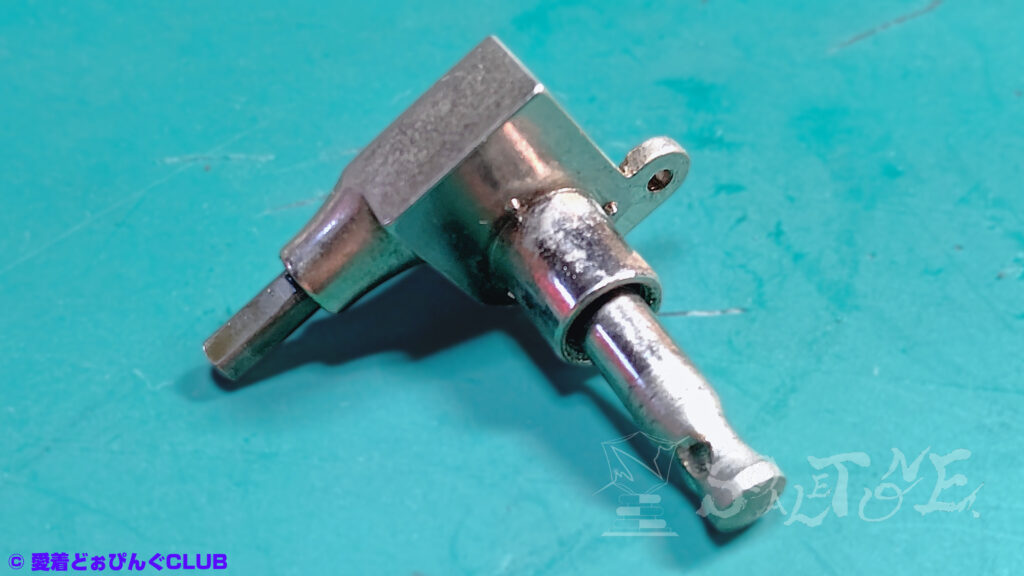
Grip both the post and shaft, and gently rotate while pulling the shaft out of the gear housing.
You may feel a slight catch, as shown in the image.
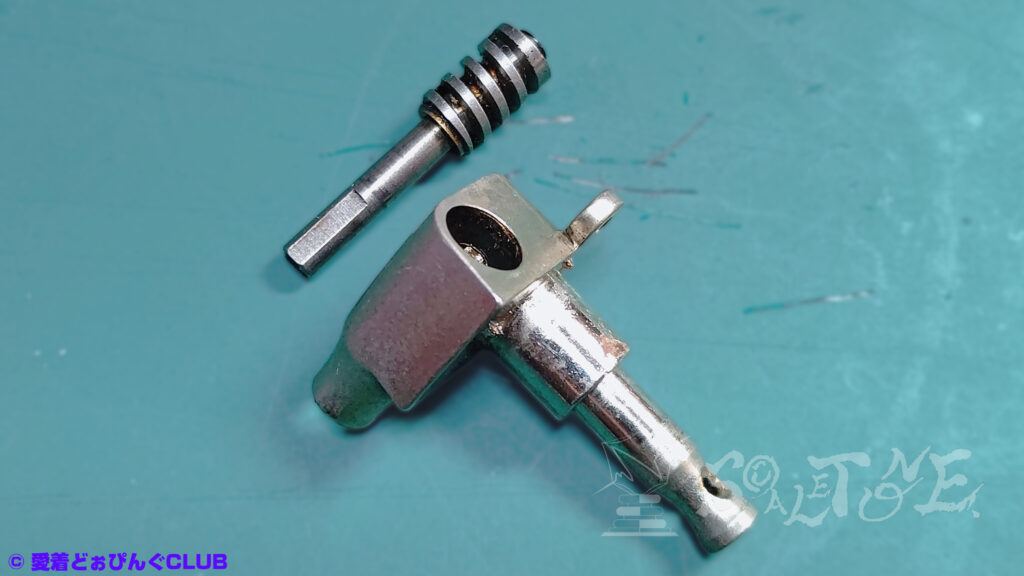
Use a smooth, steady motion—rotate and slide without forcing.
A note ahead of schedule: the shaft includes a ring spacer (gasket), which differs from the earlier washers.
Store this separately as well.
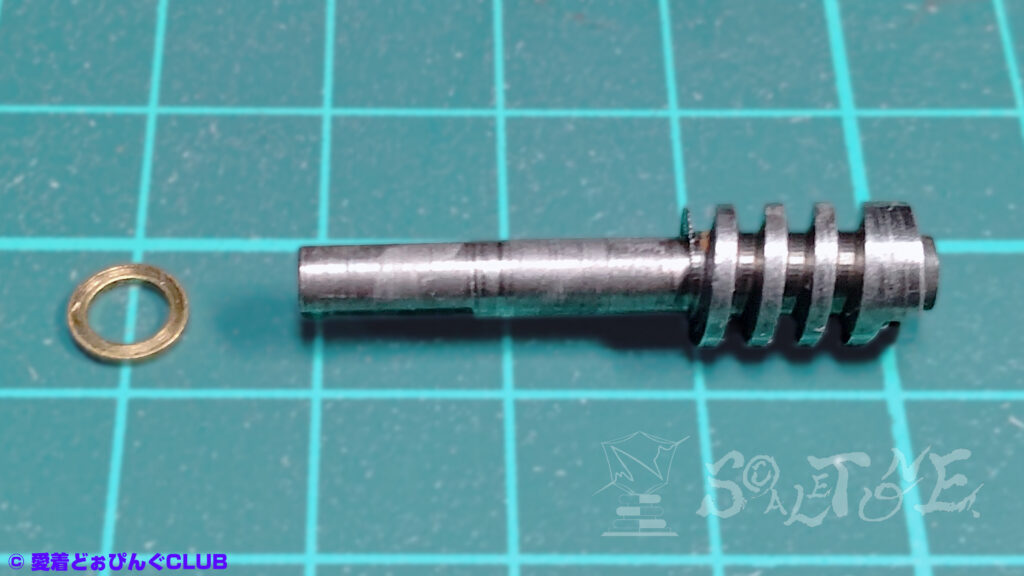
I missed this ring during photography—it may remain inside the gear case.
If so, it’s easier to remove at the end of the disassembly.
It’s a commonly overlooked part, so double-check later.
※ The change in background in the photos reflects my panic after disassembling all six pegs, cleaning them, and discovering unfamiliar parts at the bottom of the container.
Removing the Back Cover
There are four common methods:
- Glue stick
- Superglue or double-sided tape
- Pushing from behind
- Prying with a cutter or blade
Each has pros and cons.
The safest method is likely the glue stick, but it didn’t work for me—possibly due to poor degreasing—so I opted for the “push from behind” method.
Pros of pushing from behind:
• Most reliable way to remove the cover
• Least likely to damage the exterior
Cons:
• Almost guaranteed to scratch the inside of the cover unless precautions are taken
• Risk of warping the cover or damaging internal gears
• Other risks may exist—proceed with caution
※ For glue-based removal tips, see “Step 0” and “Step 1.”
Step 4:Removing the Back Cover
Tool used: an awl I had nearby.
Surprisingly easier to handle than a short hex wrench or soft spatula.
Caution:
This tool can cause injury and will almost certainly scratch the cover unless you’re prepared to accept that.
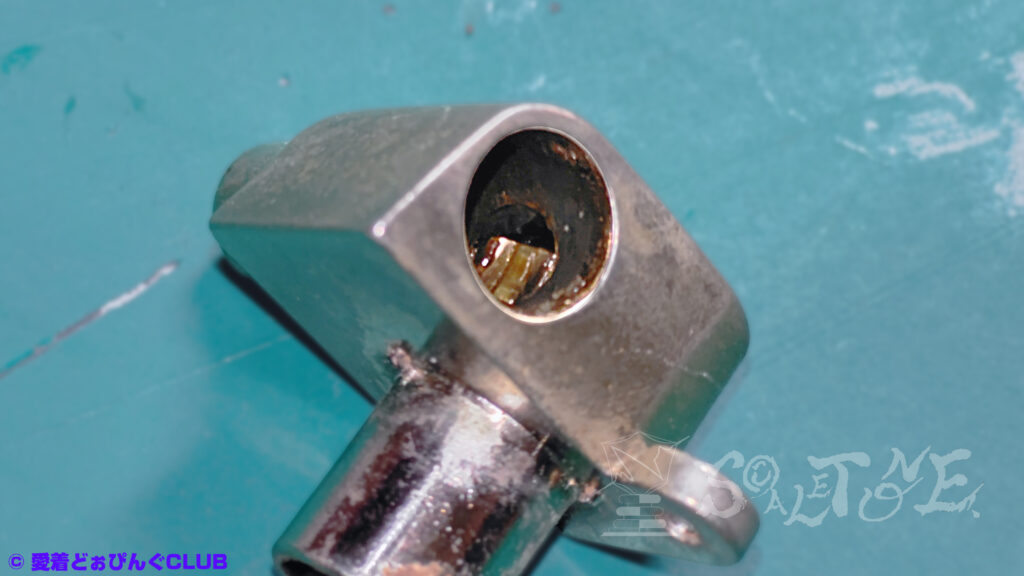
Looking through the shaft hole, you’ll see a slight gap between the case and the gear (worm wheel).

Insert the awl into this gap and push the cover out.
It’s a blunt method, no doubt.
Think “lever” rather than “poke.”
Step 5:Inspecting the Grease
Aesthetically speaking, the image here isn’t exactly pleasant—so I’ve chosen not to include it unless necessary.
The grease appears discolored, reddish-black, and likely degraded.
(I can’t say for sure, as I don’t know its original state.)
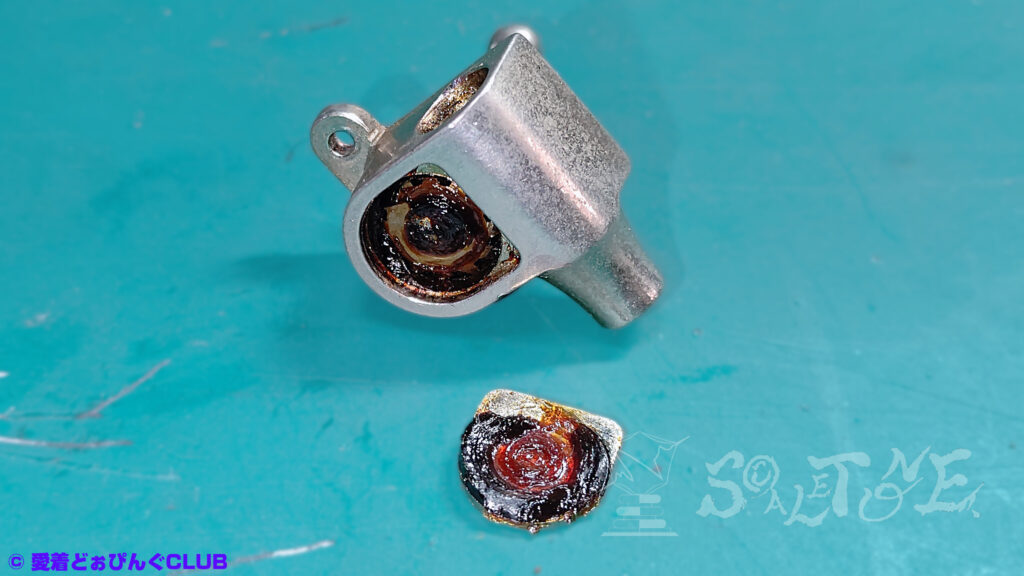
I don’t know the exact type of grease, but it’s clearly not low-viscosity.
This amount, however, serves as my reference for how much to reapply later.
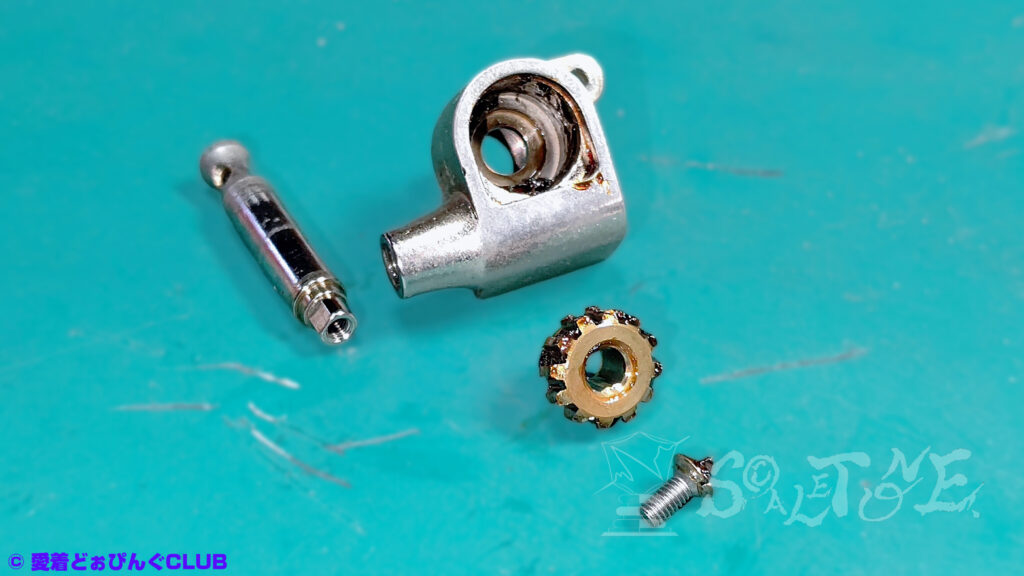
Step 6:Removing Old Grease
Using cotton swabs, Kimwipes, or cloth, I gently wipe away the old grease to make the next steps easier.
While I’m here, I take a rare opportunity to inspect the gear ratio of the worm wheel.
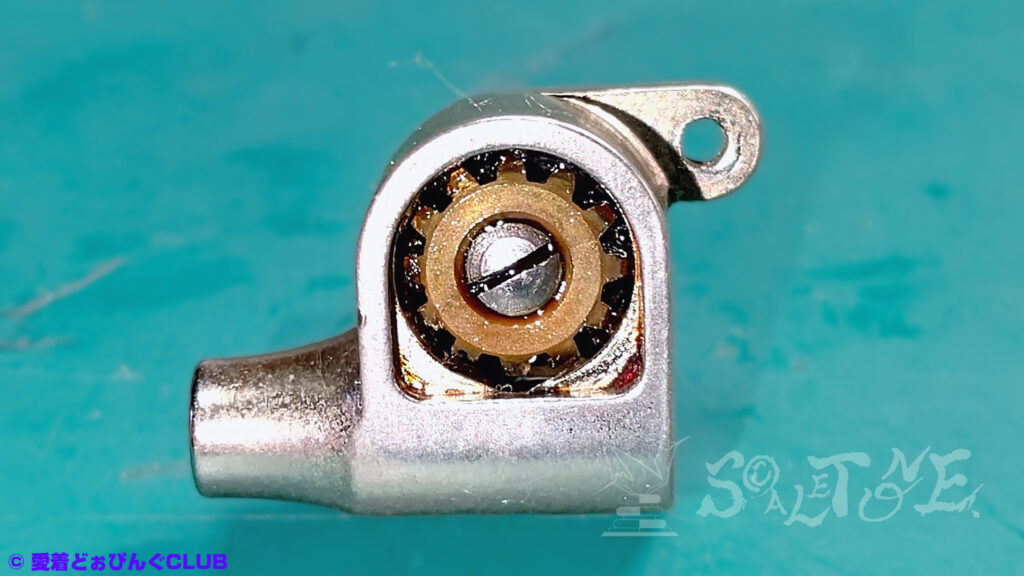
This unit has a gear ratio of 12:1.
It’s unlikely you’ll install it incorrectly, but note that the gear has a front and back orientation.
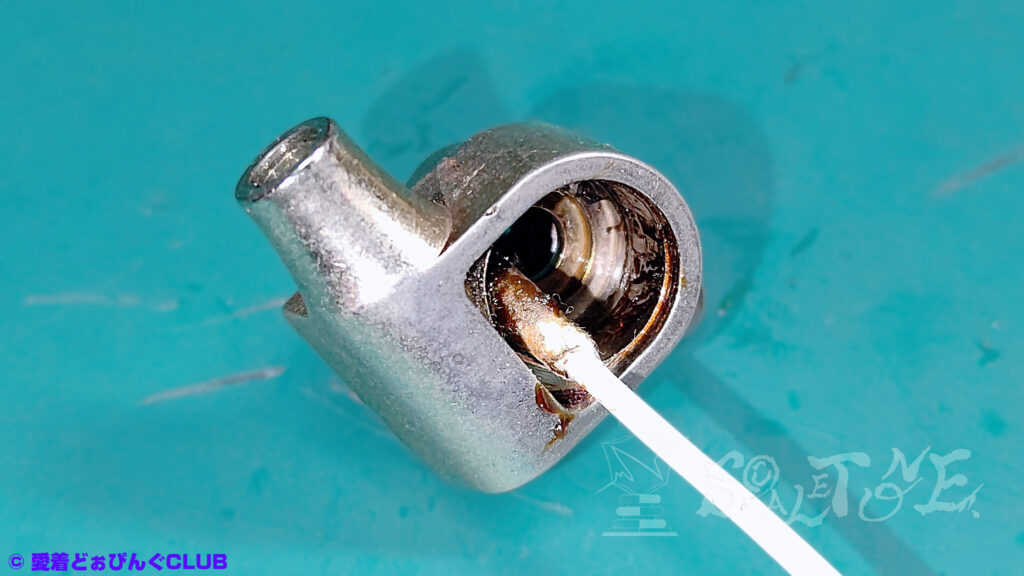
Step 7:Inspecting for Scratches
The back cover shows visible scratches.
This was my first attempt, and I was working by feel—so the damage is more severe than expected.
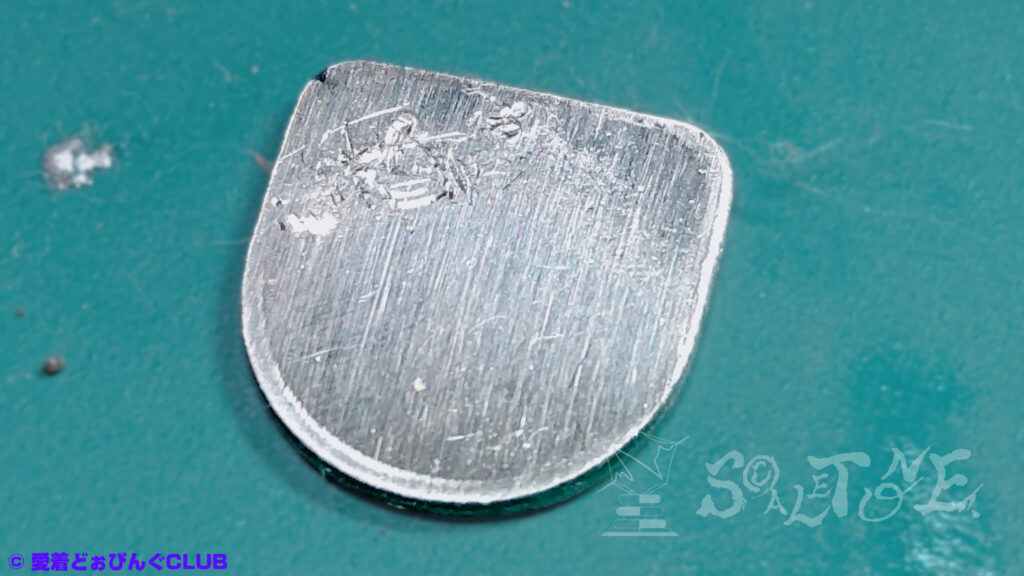
The peg came with a used guitar, and this was the first time I opened the cover.
While it’s possible the scratches were already there, I’m almost certain they’re my doing.
To mitigate this in the future, you might try dulling the edge of a flathead screwdriver and crafting a makeshift protective cap using masking tape, a glue gun, or heat-shrink tubing.
That said, if the cap fails and gets stuck in the gap, things could get messy—so alternative solutions or compromises may be needed.
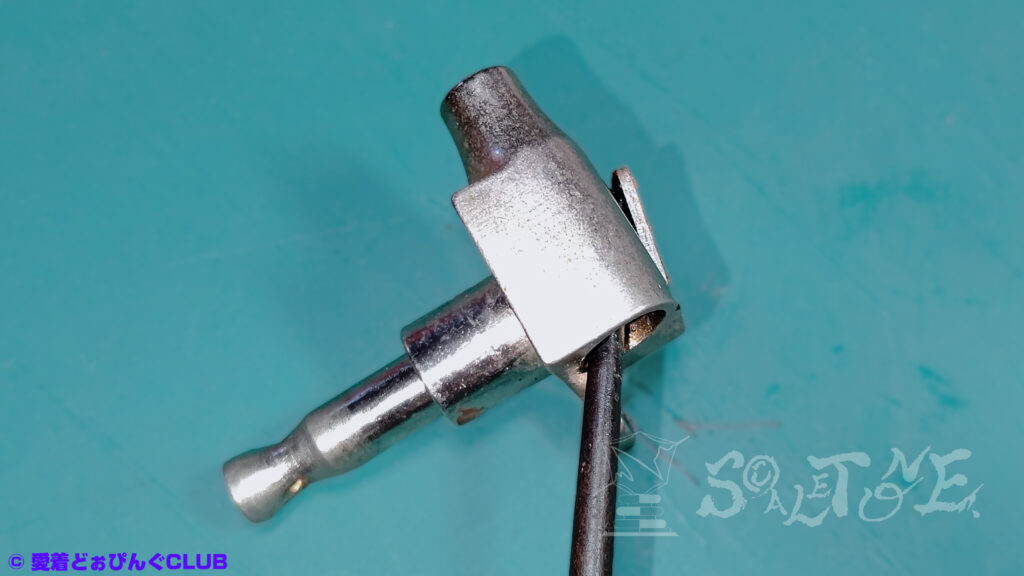
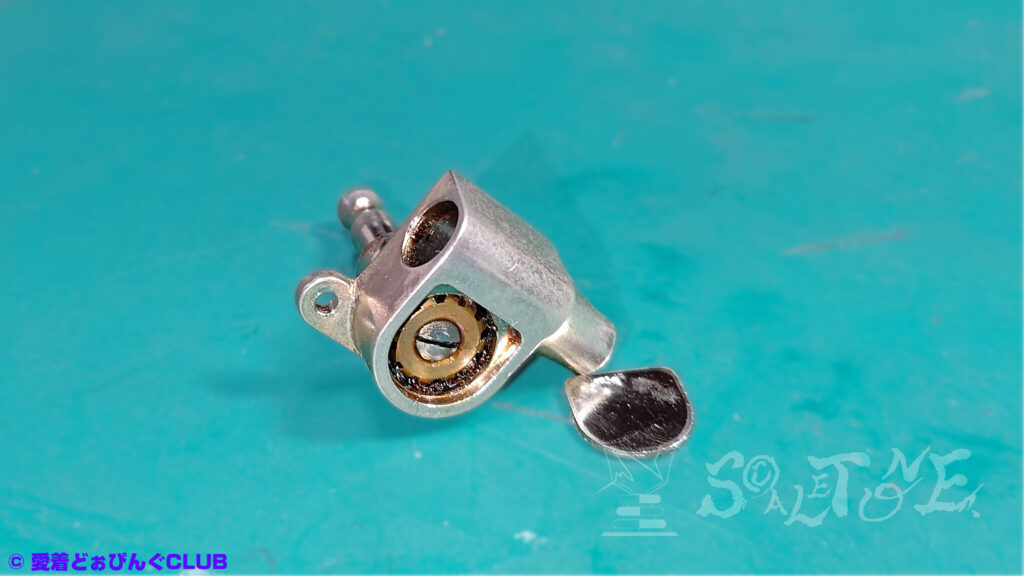
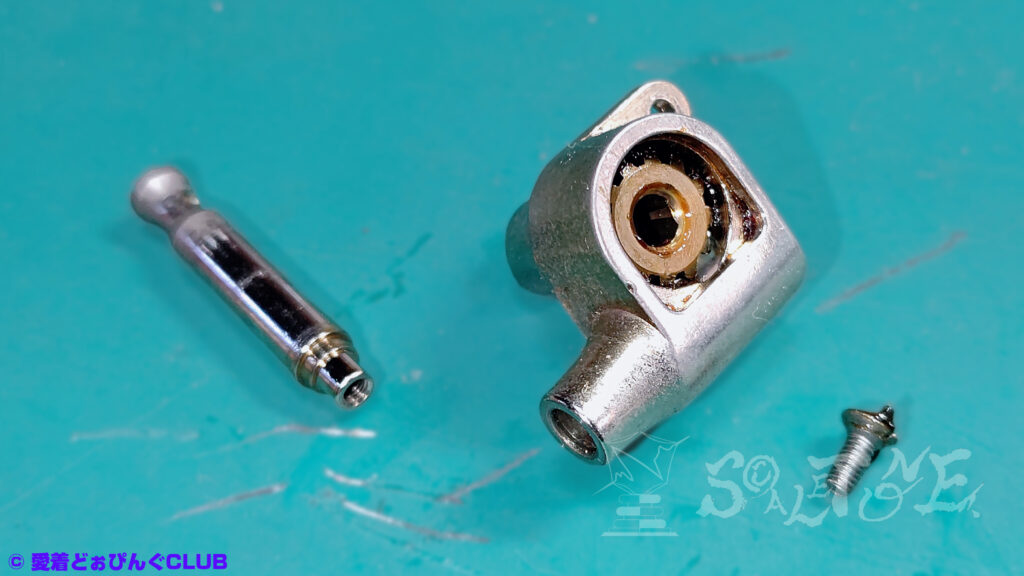
Step 8:Removing the String Post
Remove the screw that secures the post and gear.
Insert a thin rod (like a precision screwdriver) into the string hole to prevent the post from rotating while you unscrew it.
Note:
The precision screwdriver I used ended up bent after the job.
Use something you don’t mind sacrificing.
Since I won’t be using a strong cleaner during the wash phase, I pre-wipe the grease from the gear and housing to save time later.
Step 9:Checking for Gaskets
Finally, check for any remaining ring spacers (gaskets) inside the housing or on the shaft.
As mentioned earlier, these can be easily overlooked.
Even if you think you’ve removed them, double-check just in case.
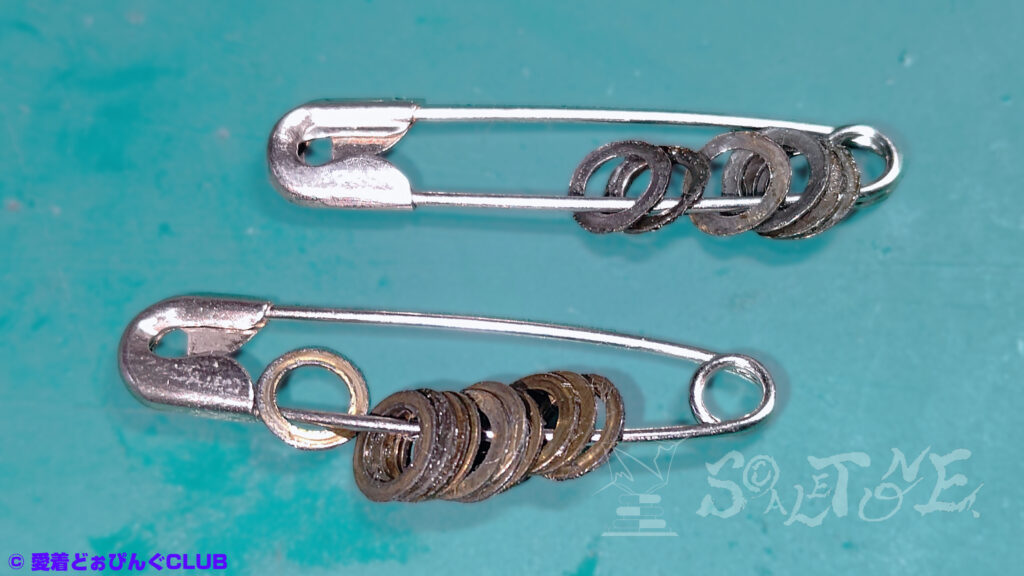
Store the removed rings securely—safety pins work well.
Disassembly Complete
That concludes the disassembly process.
Part Count – Rotomatic Pegs
For the Schaller M6 featured here, including the mount bushings, each tuner consists of approximately 15 individual parts.
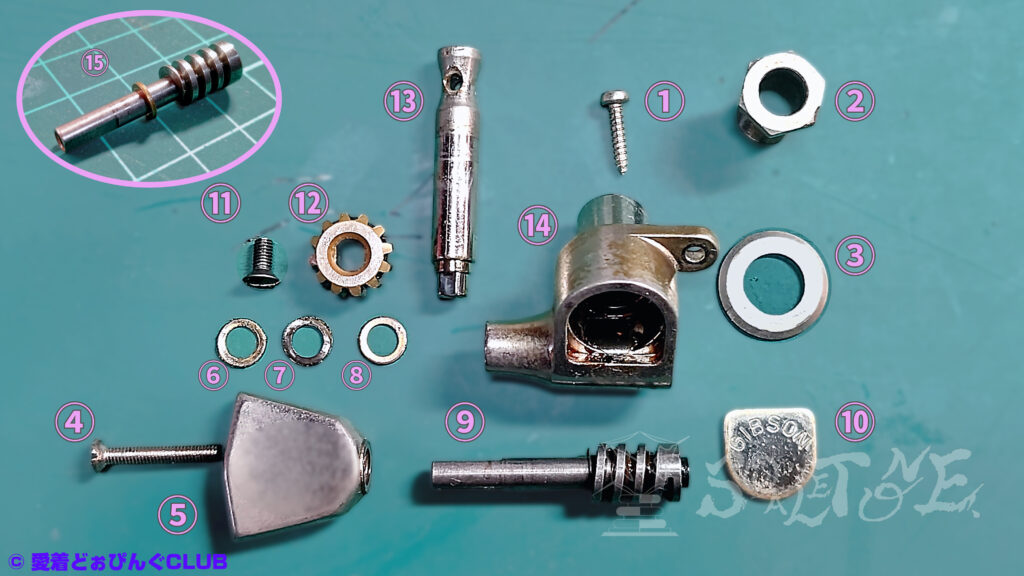
The Schaller M6, alongside Grover, is one of the foundational models of Rotomatic-style tuners.

While specs vary by year, model, and manufacturer, simple Rotomatic tuners tend to have around 15 components per unit.
Rotomatic Peg Disassembly Checklist (Example: Schaller M6)
| Step | Task | Tools | Notes |
| 1 | Remove peg button screw | Screwdriver | Watch for torque adjustment function |
| 2 | Remove button and washers | Manual | Record washer order and orientation |
| 3 | Remove shaft | Manual | Watch for resistance; check for ring spacer |
| 4 | Remove back cover | Awl or similar | Avoid scratches; apply force carefully |
| 5 | Inspect grease | Visual | Record condition and quantity |
| 6 | Remove old grease | Cotton swab, cloth | Check gear ratio and orientation |
| 7 | Inspect for scratches | Visual | Record damage and cause |
| 8 | Remove string post | Precision tool & screwdriver | Be cautious of tool damage |
| 9 | Check for gaskets | Manual | Double-check housing; store securely |
Storage Checklist – Preventing Part Loss
- [ ] Sort washers individually and store with safety pins
- [ ] Record spring washer orientation
- [ ] Recheck for gaskets
- [ ] Organize parts in a dedicated case
- [ ] Use trays or lidded containers to prevent loss during work
Tool List – Disassembly
Essential Tools:
- Three screwdrivers: for body screws, peg button, and worm wheel
- Socket wrench: for mount bushings
- Rod for pushing back cover
- Rod for securing string post
Amazonでの検索結果:“ドライバーセット“
Amazonで購入する:“スイングハンドル付ミニボックスレンチ 3本セット“
Loss Prevention:
- Safety pins or zip ties ×4: for washers ×2, spring washer, gasket
- Parts case
- Lidded container (e.g., Tupperware)
- Tray
Optional Tools:
- Cleaning: cotton swabs, Kimwipes, cloth
- Protection: masking tape
- Gloves
Amazonでの検索結果:“キムワイプ“
Other Ideas (Alternatives):
- Glue stick
- Heat-shrink tubing
- Torch lighter
- Flathead screwdriver
- File
Amazonでの検索結果:“グルースティック“
ScALETONE’s Note:Next Time
That wraps up Part 1: Disassembly.
This may well be the highlight of the series—right at the start.
Still, the story continues.
Next up: Part 2 – Cleaning.
Parts 2 and 3 will serve as bridges to the final reassembly and greasing phase.
They may seem like ordinary steps—just washing and polishing—but even the process of removing 40 years of grime and slowly restoring shine has its own quiet joy.
Stay tuned.
“Schaller ペグ”の検索結果
“ロトマチック”の検索結果