PR
I’m a born-and-raised Japanese. English is a complete mystery to me—and honestly, my Japanese is just mystery with a little extra fuzz.
This post was translated by AI. Read at your own risk!
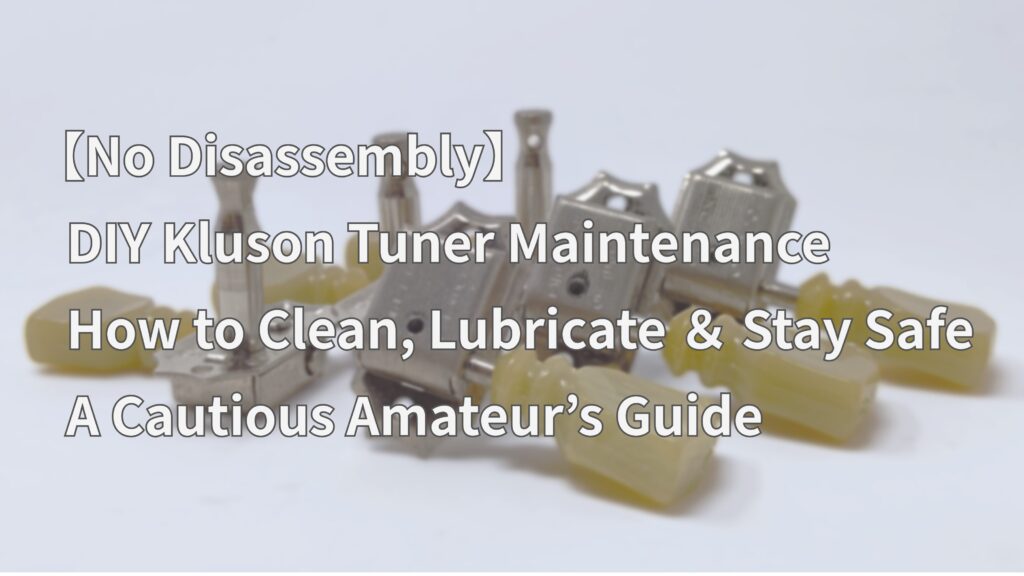
This article documents a personal, amateur attempt to maintain Kluson-style tuners without disassembly.
The method is risky, and not recommended.
Please enjoy this as a story—not a tutorial.
If you choose to try anything described here, do so entirely at your own risk.
We take no responsibility for any damage or heartbreak that may occur.
Please proceed at your own risk.
If you’re unsure, consult a professional.
I’m just a passionate amateur sharing what’s worked for me.
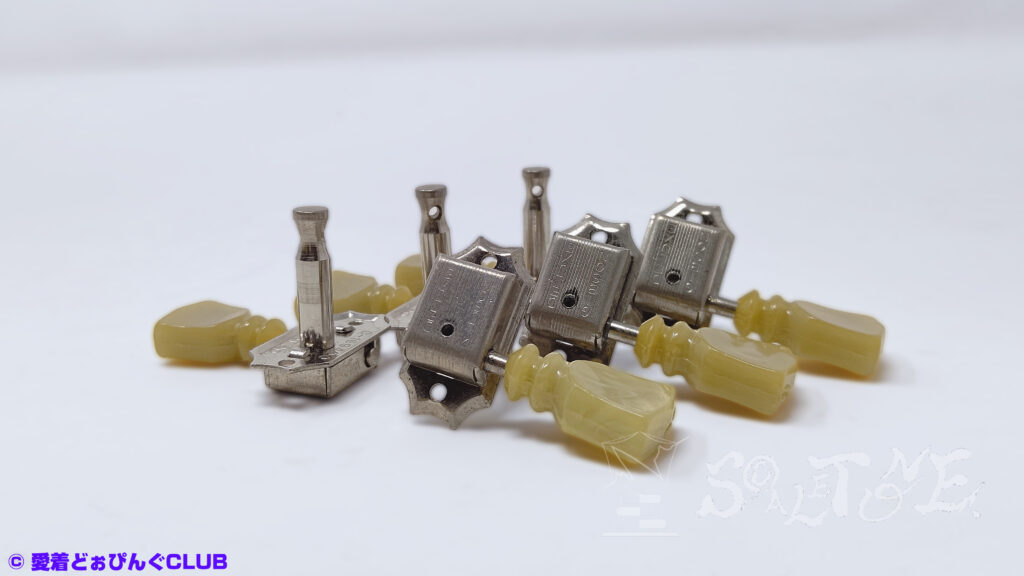
This time, I’ll be attempting a cleaning and greasing of the inside of Kluson-style tuning pegs—without disassembling them.
I’ll walk you through the structure, tools, and step-by-step process for maintaining guitar tuners, with a focus on safety and clarity.
- Introduction
- Tools & Safety Notes
- Steps and Precautions
- 3. Step-by-Step Process
- Judging Completion
- Lubrication Port & Grease Selection
- Adjusting Torque Feel
- Resin & Oil Compatibility
- Other Methods
- S©ALETONE. musings
Introduction
Kluson-style pegs are notoriously fragile when it comes to their cover tabs. Once disassembled, there’s a high risk of breakage that makes reassembly nearly impossible.
Because of this, they’re not well-suited for full overhauls.
So in this method, I won’t be taking them apart.
If you’re unsure about doing this yourself, I recommend either consulting a professional or treating the pegs as consumables and replacing them.
The pegs I used here had already been tweaked in a previous post, and they’ve since settled into “storage duty” without any major issues.
Originally, I hadn’t planned to write about them—but given the flow of recent posts (and a nagging sense of incompleteness), I decided to document the process after all.

I’ll keep the walkthrough brisk.
No polishing this time.
※ There are polishes specifically labeled for “plated” surfaces.
Even well-known metal polishes may contain abrasive compounds that aren’t ideal for plating, so it’s worth keeping that in mind.
I’ve tried to explain everything in detail, but one thing’s missing: I forgot to include any photos of the greasing process. My apologies.
As always, this is a record of a DIY attempt carried out by an amateur, on my own responsibility and with a healthy dose of improvisation.
I’ve included notes on my concerns and countermeasures, but it’s entirely possible that my assumptions are flawed or that I’ve overlooked something important.
If this post sparks any kind of insight for you, I’ll be glad—but please proceed at your own risk.
Tools & Safety Notes
Basic Tools
Screwdriver set
Used to remove the tuning pegs.
Bushing puller (if needed)
Removing bushings can loosen the wood around the holes. In the worst case, it may damage the headstock itself. Avoid pulling them unless absolutely necessary.
Kimwipes
Disposable paper that’s handy to have around.
Low lint, ideal for precision cleaning.

Paper soaked with parts cleaner may ignite. Dispose of it safely—e.g., in a lidded container with water.
Amazonでの検索結果:“キムワイプ“
Tray
Used to catch splashes and residue from the parts cleaner. Also useful for soaking or brushing components.
This time I used a stainless steel tray.
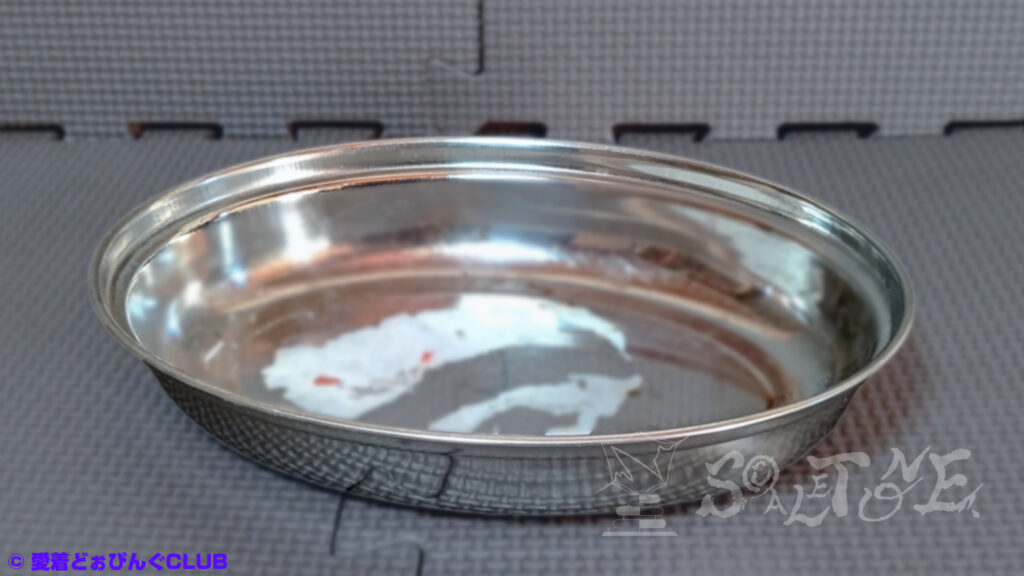
Even with a fast-drying cleaner, splashes are frequent and residue tends to pool at the bottom.
Air duster
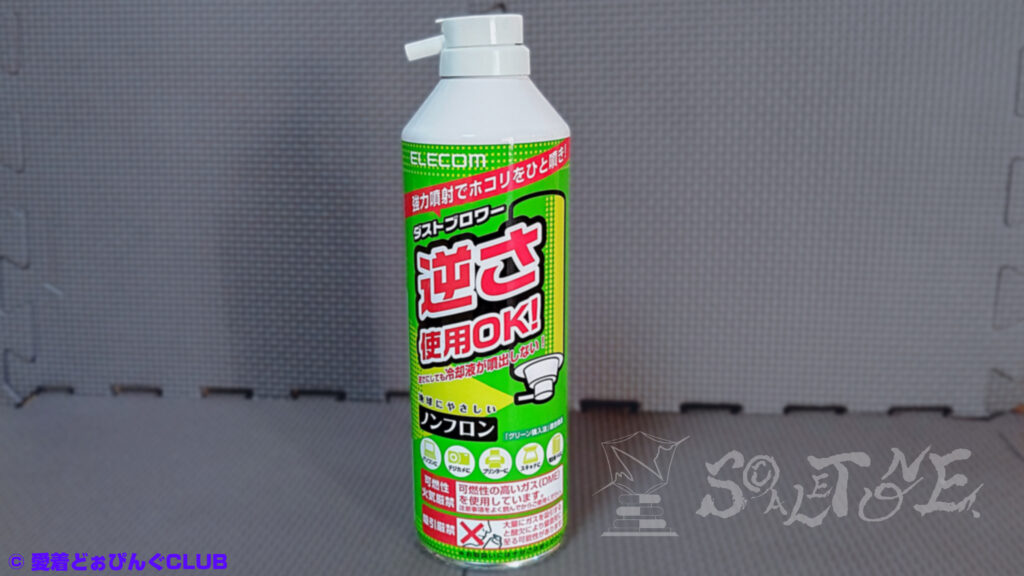
Used to blow out any remaining cleaner from inside the peg.
Effectiveness: questionable.
Amazonで購入する:“エアダスター“
Masking tape / Protective tape for painting
Used to shield surrounding areas during work.
Masking tape
If you do guitar maintenance regularly, you might one day find yourself needing Kamoi’s “Miracle Mint” in addition to the classic yellow “3M” tape.
Amazonで購入する:“マスキングテープ“
Protective tape for painting
Typically used in construction and painting.
Amazonで購入する:“塗装 養生テープ“
Cleaning & Lubrication
Some parts cleaners and greases can damage materials like plastic, rubber, or paint. So choose carefully.
- Since the peg button material was unknown, I used a type that’s safe for plastic.
- There’s no such thing as “absolute safety,” so I recommend testing on an inconspicuous area first.
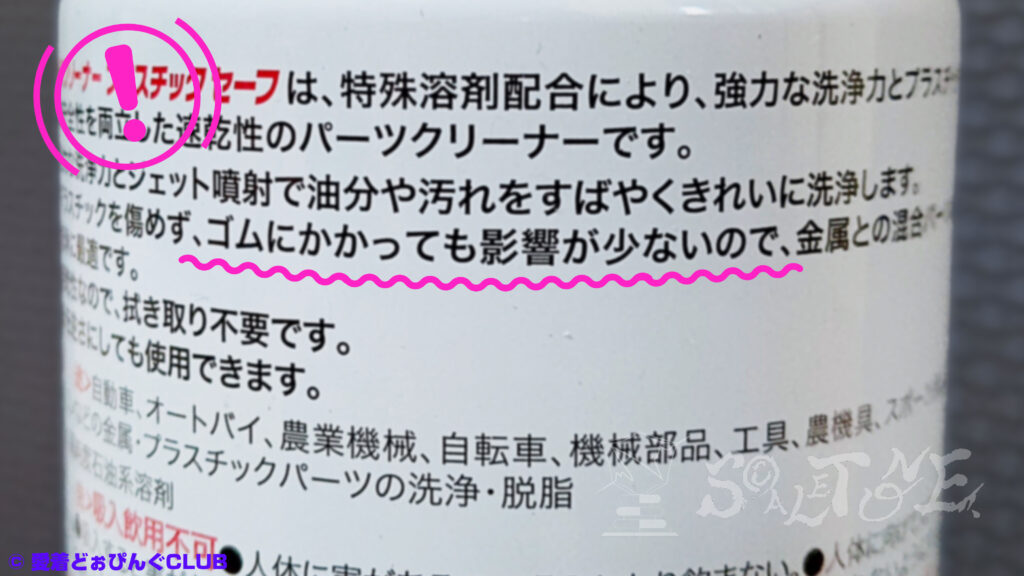
Parts cleaner 【plastic-safe type】
The packaging looks similar to that of well-known lubricants, but this is a cleaner.
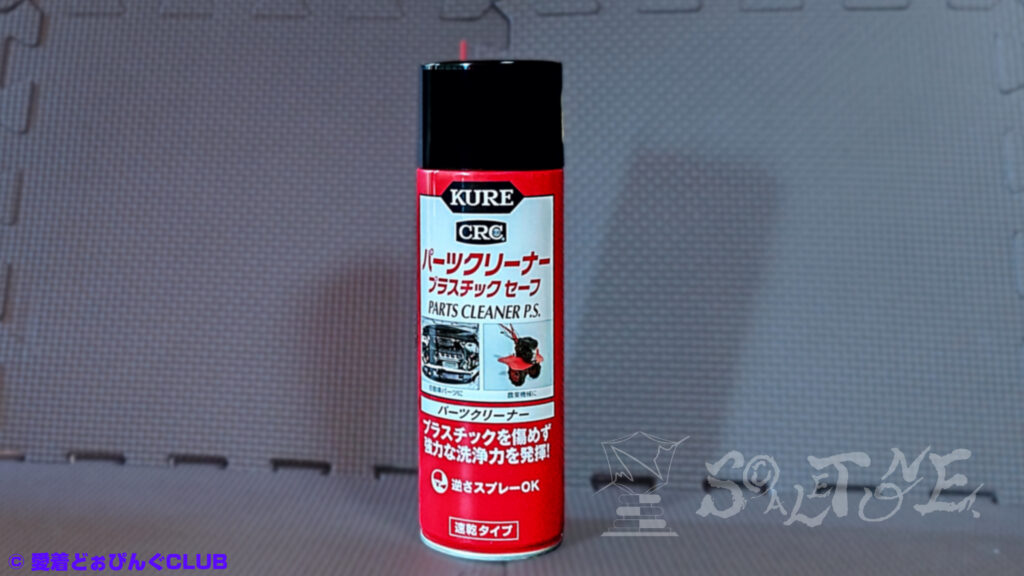
If the plastic buttons were to melt or crack, it’d be a disaster—so I chose a type that claims not to damage plastic.
That said, I’m not confident enough in my own judgment to declare anything “100% safe.”

As the label says:
Plastic and rubber may react differently depending on material, age, and stress. Always test on an inconspicuous area first.”
There are no guarantees.
The goal here is degreasing—removing old grease.
I’m not an expert, but I figured that if it also washes away dust and grime stuck to the oil, that’s a bonus.
Amazonで購入する:“パーツクリーナー“
Honestly, with so many types available, I found myself unsure which one was “correct.”
Brass, nickel, and chrome plating are said to form a “passivation layer” that resists rust, but this doesn’t guarantee long-term protection.
Steel parts, on the other hand, rely on oil to prevent rust—once degreased, oxidation can begin quickly.
So don’t forget to apply rust protection afterward.
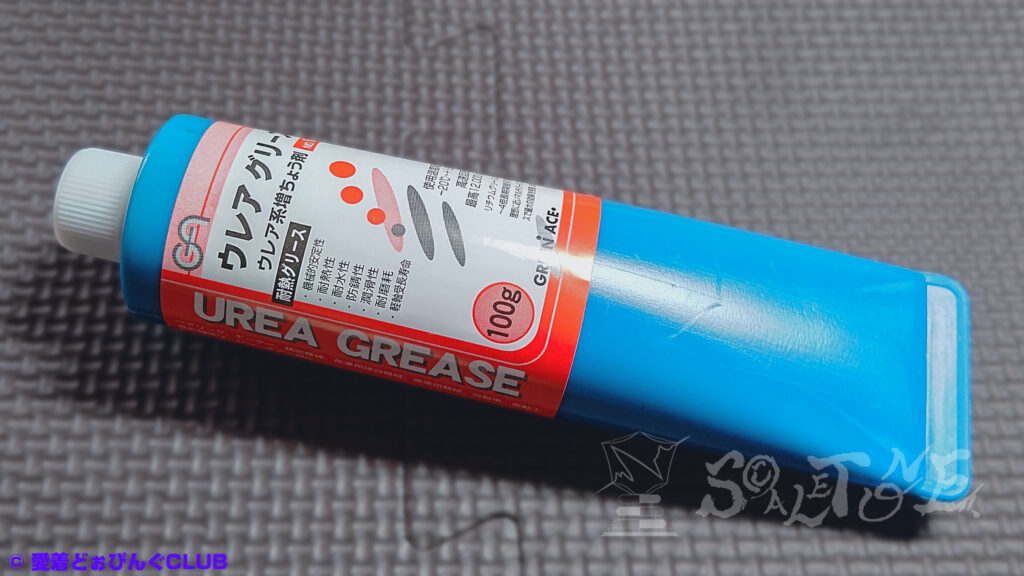
Grease
Used for lubrication.
This time I used “urea grease”.
Amazonで購入する:“ウレアグリース“
Other / Supporting Items
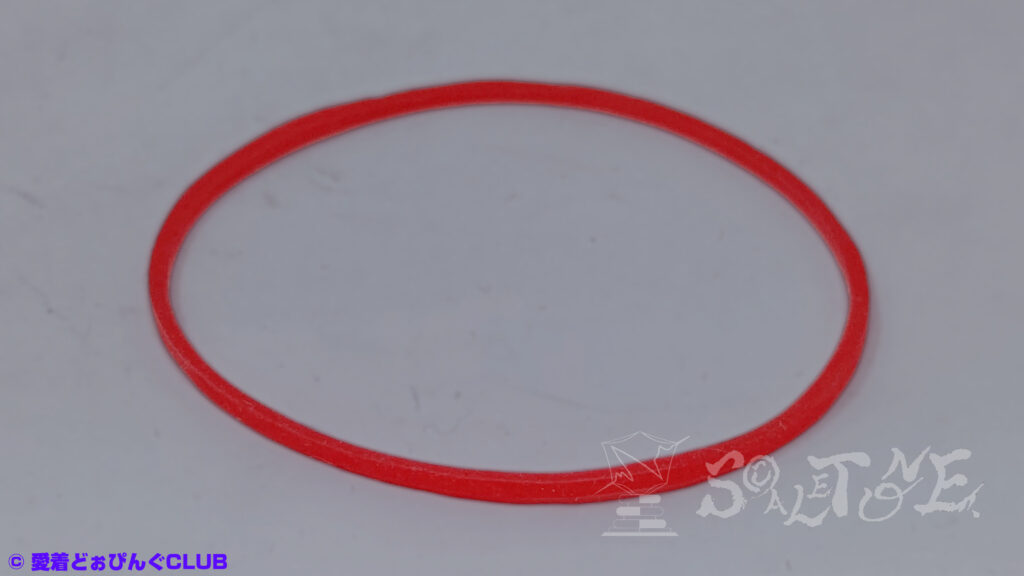
Rubber bands
Purpose explained later.
Neutral detergent / Rubber gloves / Toothbrush
Used for light cleaning and to protect your hands.
Rust inhibitor (if needed)
Used to protect metal after degreasing.
※ Brass, nickel, and chrome are rust-resistant due to passivation, but steel parts may oxidize quickly once oil is removed.
A spray-type grease might be useful to reach inside the gear housing.
Steps and Precautions
Minimum Safety Precautions Before Starting
- Secure a safe workspace
- Keep away from open flames (parts cleaner is flammable)
- Ensure good ventilation
- Avoid skin contact (rubber gloves recommended)
- Use a mask to avoid inhaling fumes
- Wear clothes you don’t mind getting dirty
- Be mindful of how solvents and oils interact with resin and paint
3. Step-by-Step Process
Step 1.: Remove the pegs
- Loosen and remove the screws holding the tuning pegs.
- If bushings are present, decide whether to remove them.
※ I left mine in place to avoid damaging the headstock.
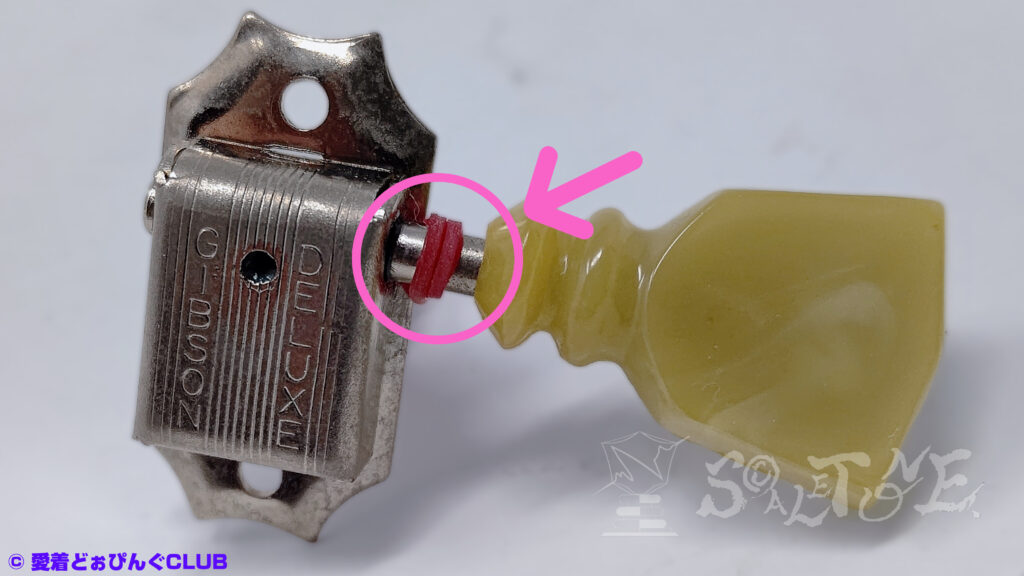
“Before” Photo
Here’s a “Before” shot of the peg I’ll be cleaning internally.
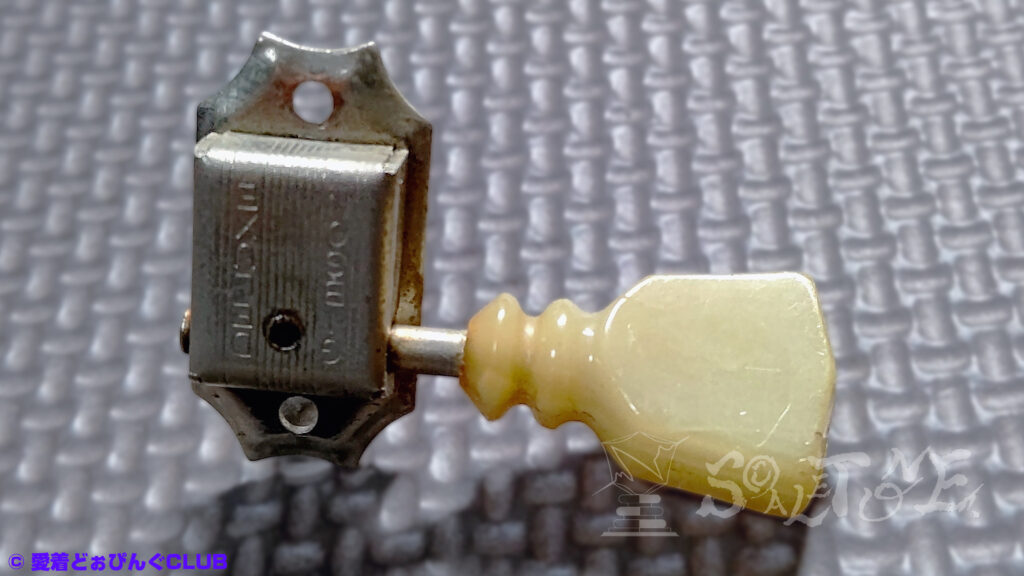
※ The step-by-step photos that follow were taken in advance to help illustrate the process.
Step 2. :Protection & Masking
Step ①:Masking tape for initial protection
This isn’t just to shield from the parts cleaner—it also helps prevent strong adhesive from sticking later on.
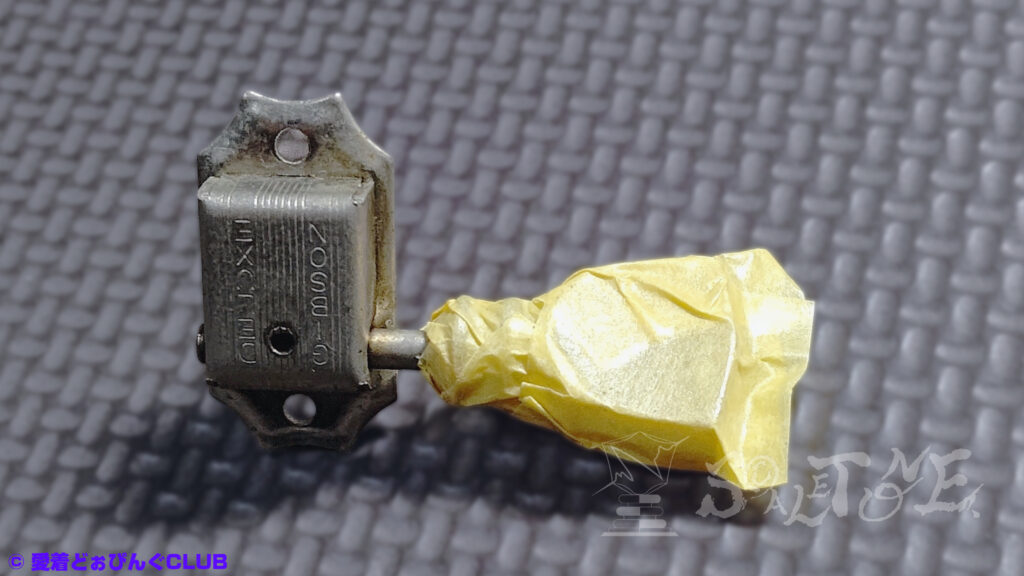
Step ②:Double protection with painting tape
Next, I added a layer of painting tape.
This type is designed to resist solvents, and also offers good adhesion and water resistance.
Apply carefully to avoid gaps where cleaner could seep in.
Around the shaft, as shown in the photo, the contact area is narrow—so precision matters.
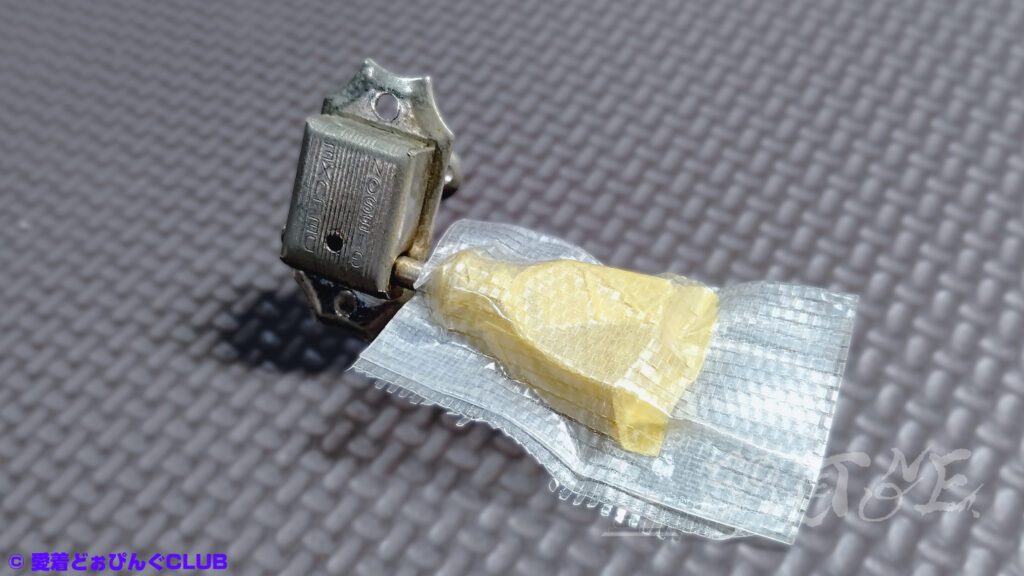
Preparation complete
All six pegs have been masked.
That said, I judged my initial taping as “sloppy,” so I re-applied some areas before starting the actual work.
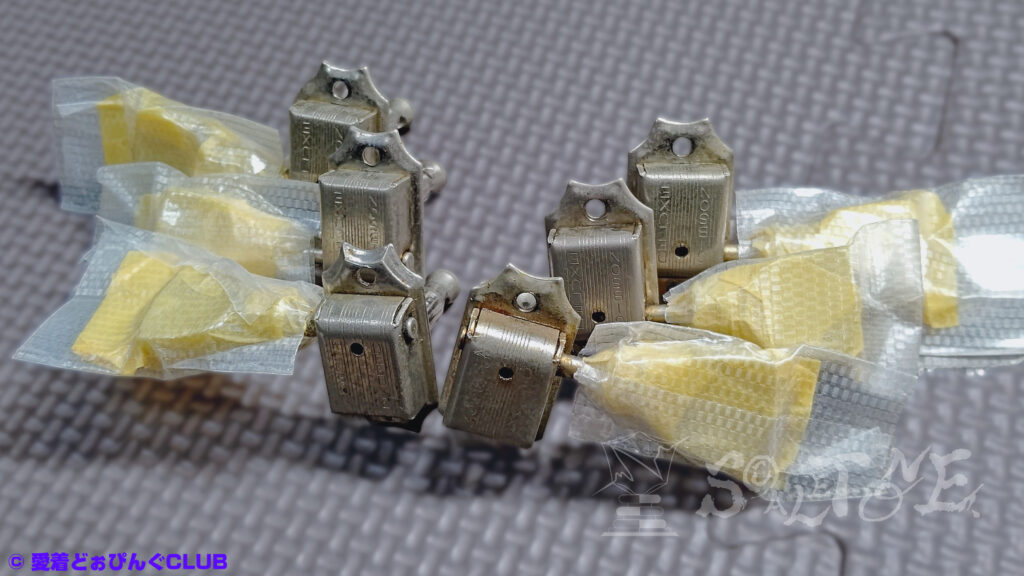
Step 3. :Extra Sealing with Rubber Bands
Just before cleaning, I came up with an extra safety measure using rubber bands.
The photo was taken after removing the masking tape, so consider this a post-hoc report.
Feeling uneasy about my own sloppiness, I decided to err on the side of caution.
I wrapped rubber bands over the protective tape as a makeshift seal—just in case.
Of course, rubber can degrade over time, so it’s not foolproof.
But for me, there’s no contest:
The peg buttons—each one irreplaceable—matter far more than a few easily replaced rubber bands.
Step 4.:Cleaning Process
Internal Cleaning Process Step ①:Parts Cleaner
※ This was done outdoors, using a stainless steel tray.
The spray comes out with force—handle with care.
Always be vigilant to prevent the cleaner from seeping into the peg buttons.
It dries quickly, but I wiped it off immediately each time.
If you notice any gaps in the protective tape, stop the process right away.
Check the seal, replace the tape if needed, and if any cleaner gets on the peg buttons, rinse it off immediately.
Hydrolysis is also a concern, so wipe off any moisture promptly.
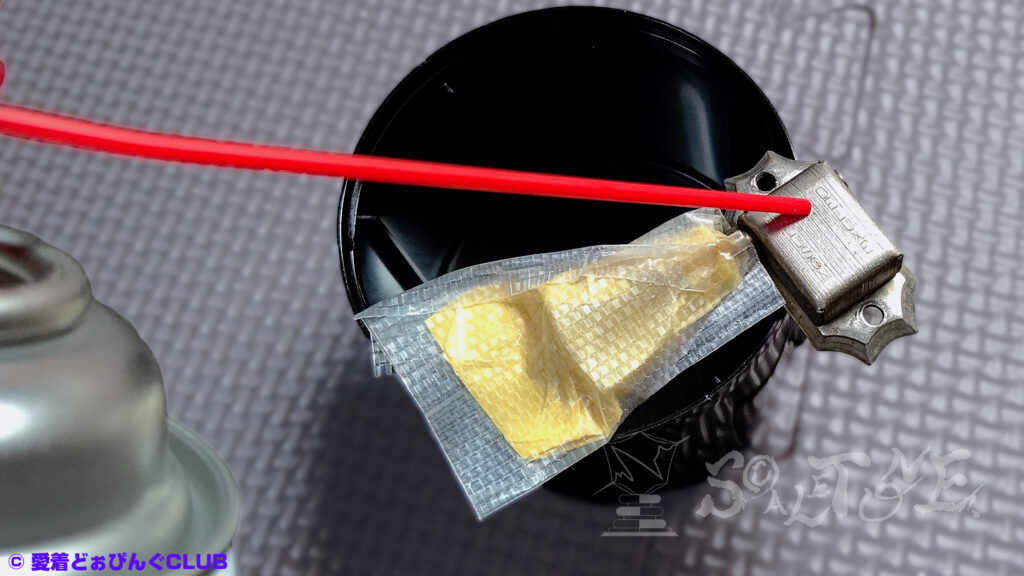
Internal Cleaning Process Step ②: Air Duster
To prevent splatter, I wrapped the peg in a Kimwipe and used an air duster to blow out any cleaner left inside.
Just like with the parts cleaner, I placed the nozzle at the lubrication port and sprayed air into the interior.
(An extension nozzle was included.)
I can’t say how effective it was, but I hoped it would blow out any excess cleaner—along with grime—before it dried completely.
Bonus Step:Reusing Residual Cleaner
This adds a few more worries, but I reused the cleaner pooled in the tray to lightly soak and gently clean the exterior.
I used Kimwipes and a soft, worn toothbrush.
Since the liquid may already be dirty, you’re essentially rubbing that back onto the surface—so don’t let this be your final step.
For me, this was just a “while I’m at it” kind of task.
Judging Completion
I repeated steps “4-①” and “4-②” (plus the bonus step) as many times as I felt necessary—without putting stress on the pegs.
Since the original grease and grime hadn’t caused any functional issues, I didn’t see any visible runoff during cleaning.
I couldn’t find a clear visual cue to mark completion, but since some grease inevitably gets removed, assuming the shaft isn’t deformed, the key indicator might be a change in torque feel during rotation.
Lubrication Port & Grease Selection
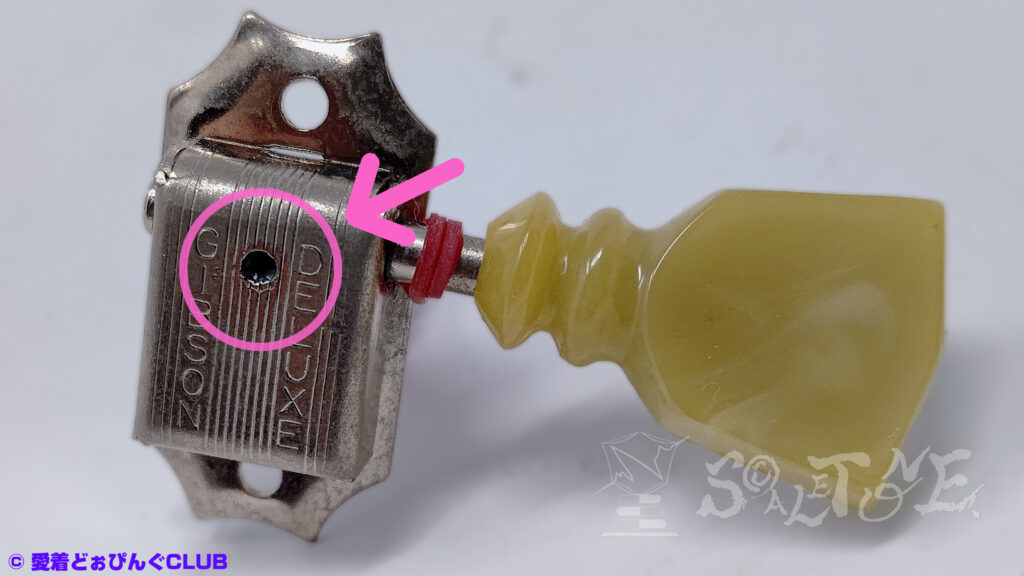
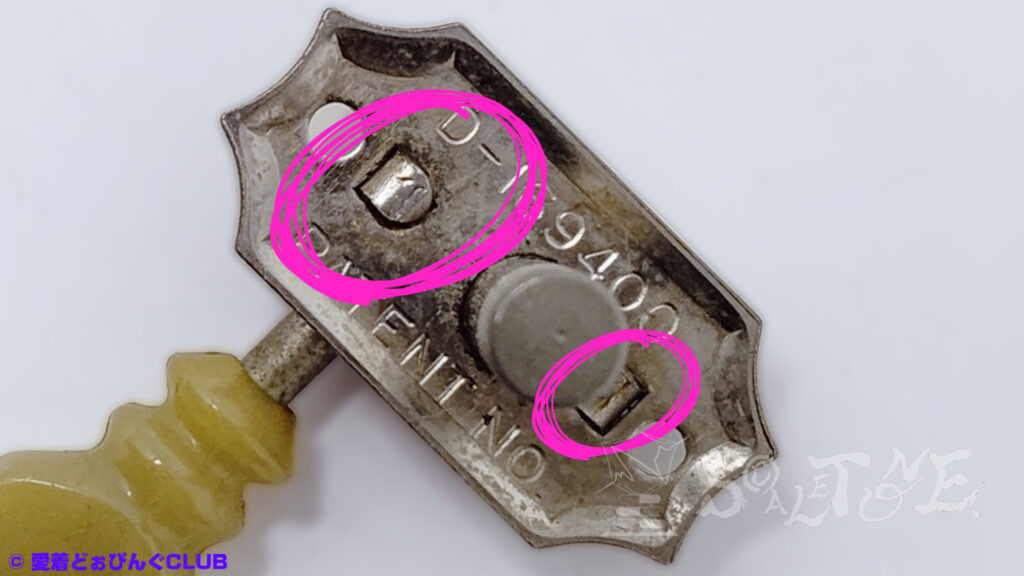
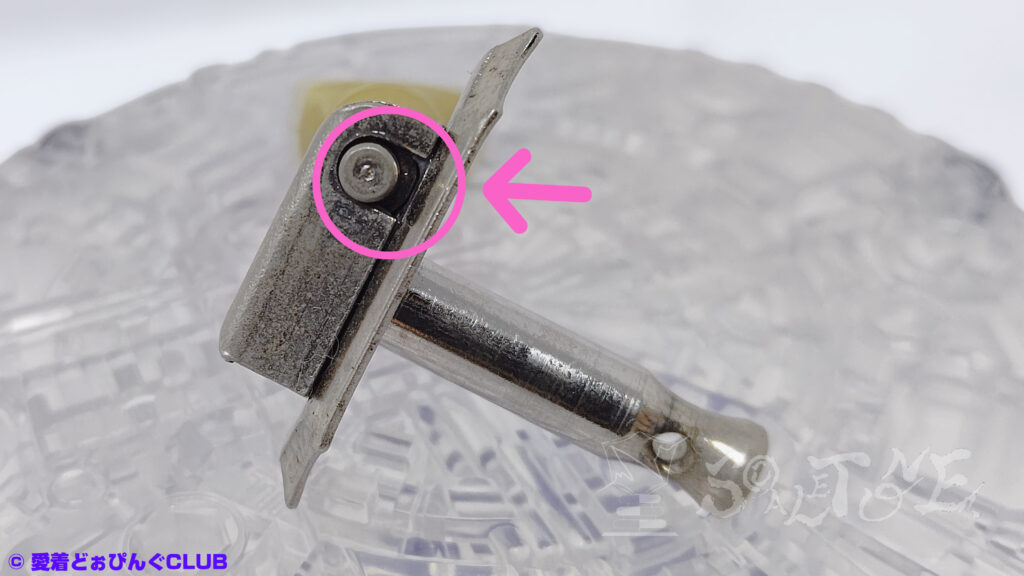
The hole where I inserted the parts cleaner nozzle is actually designed as a lubrication port.
Urea Grease
There are many types of grease, and their usage descriptions often overlap—so honestly, I’m not sure what’s best.
For Kluson pegs, even basic machine oil like sewing machine oil might work just fine.
This time, I chose urea grease, which seemed suitable for gearboxes.
If you start worrying about viscosity or long-term oxidation, there’s no end to it.
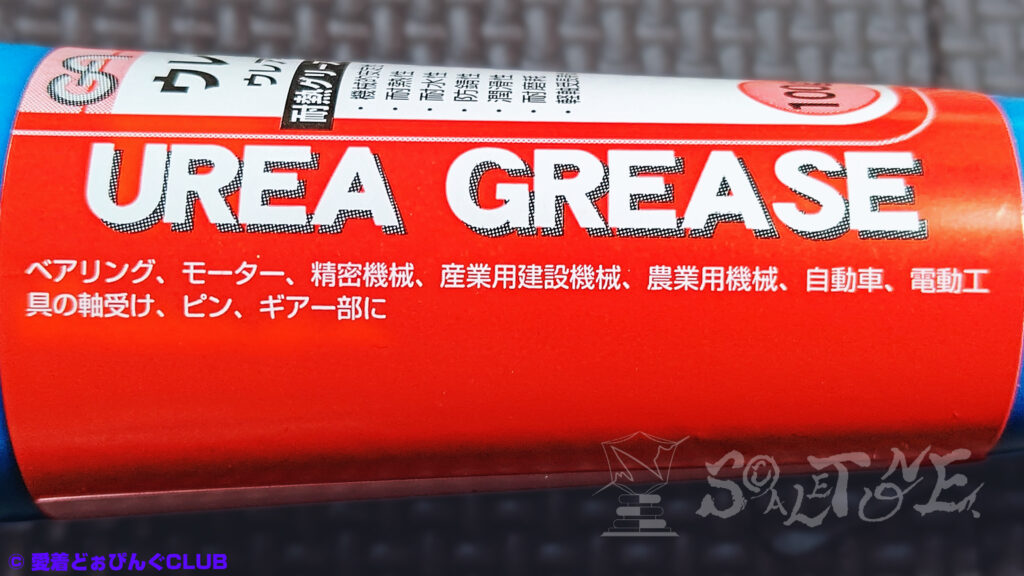
There are “premium” greases out there, and if I’d ignored the actual purpose, I might’ve chosen one just because it sounded fancy.
I didn’t calculate cost per gram, but comparing similar-sized products in-store, the price difference was only about ¥200($1~2)—so I managed to stay focused on the real goal.
※ Whether this was the “right” choice, I honestly can’t say.
Greasing Procedure
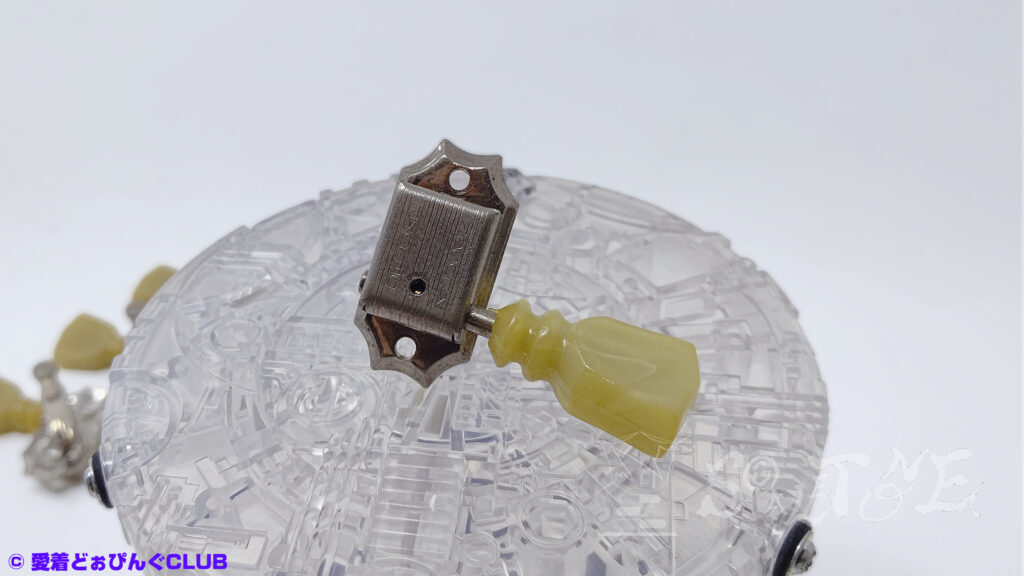
Using the included nozzle, injector, or dropper, inject grease through the lubrication port in the cover.
Rotate the shaft while applying grease and observe the movement.
Also apply grease to the shaft’s opposite end.
If rotation becomes smoother, that’s probably enough.
Even a generous amount is likely no more than “two scoops with an ear pick.”
Toothpicks or spatulas are fine for pushing grease into holes or gaps, but if they break and jam the gears or fall inside, it’s a hassle.
Adjusting Torque Feel
Proper greasing should make rotation smoother.
That’s the whole point—if it doesn’t, something’s wrong or malfunctioning.
With Kluson-style pegs, unlike sealed Rotomatic types, excess grease simply leaks out through gaps.
So don’t expect much torque adjustment via grease.
Resin & Oil Compatibility
Oil can degrade resin depending on compatibility—so be cautious.
Given everything discussed so far, I don’t recommend using parts cleaner on peg buttons, even if labeled “plastic-safe.”
Also avoid wet wipes containing alcohol when wiping them down.
Alcohol and resin don’t mix well, and may cause cracking.
Rust Prevention
I had planned to lightly spread grease on the exterior while wiping it down, and use spray grease inside the gearbox.
But since I’m unsure whether mixing different greases is safe, I didn’t go through with it.
In hindsight, if a suitable grease exists, spray grease might’ve been easier from the start.
Other Methods
Neutral detergent
Soak in dish soap labeled “neutral” to remove oily grime.
Do not soak the peg buttons.
Ultrasonic cleaner
Potential risks when using ultrasonic cleaning:
- It may cause plating to peel, so avoid use if you notice any lifting.
- Hydrolysis and cracking are also concerns—so it’s safest not to soak the peg buttons.
S©ALETONE. musings
This project was purely a record of trial and error by an amateur.
I researched the structure of the pegs and the compatibility of materials, and tried to proceed as carefully as possible—but I don’t have professional knowledge or equipment.
In particular, the use of parts cleaner and its effects on resin components can vary depending on the product and the condition of the parts over time.
There’s no guarantee that problems won’t arise in the future.
If you choose to use this post as a reference, please assess your own environment and parts carefully, and proceed at your own risk.
Also, even for small tasks, I strongly recommend taking safety precautions—no open flames, good ventilation, and protection for your skin.
Though I worked with a fair amount of uncertainty, I prioritized “not breaking anything” and “not accelerating deterioration.”
Within my current abilities and knowledge, I did my best to think things through and act accordingly.
If this record helps someone else who’s facing similar doubts, or sparks any kind of insight, I’ll be glad.
→ Back to the list of tools featured in this post
This has been a story of dreams, illusions, and constructed fiction shared with the reader.
Its practical value and factual accuracy are not guaranteed.
This text is based on AI-generated translation. The author is a native Japanese speaker with limited proficiency in both English and Japanese.
Please proceed at your own discretion.
AI wrote this. I just watched.
Original Content – Japanese Version
Disclaimer
This article documents a personal, amateur attempt to maintain Kluson-style tuners without disassembly.
The method is risky, and not recommended.
Please enjoy this as a story—not a tutorial.
If you choose to try anything described here, do so entirely at your own risk.
We take no responsibility for any damage or heartbreak that may occur.
Please proceed at your own risk.
If you’re unsure, consult a professional.
I’m just a passionate amateur sharing what’s worked for me.