
Maintenance Series Vol.1: Inside the Schaller M6
Side Note: Prototyping a Custom Tool for Rotomatic Peg Maintenance
※ Main article:Reassembly Edition – Rotomatic Peg Complete Maintenance Guide

In the previous guide, I introduced a tool used to seal the back cover.
But the photo didn’t sit right with me—so I made a dedicated tool.
Not out of necessity, but out of aesthetic discomfort.
- Two Prototypes
- What Counts as a “Custom Tool”
- A Note on Intent
- Origin Story
- Version 1: Extended Back Cover Removal
- Tools Used
- Step 0: Back Cover Removal (Hypothetical)
- Step 1: Molding
- Step 2: Glue Stick + Socket
- Step 3: Depth
- Step 4: Cutting Line
- Step 5: Cutting
- Step 6: Completion
- S©ALETONE’s Note: Final Thoughts
- Related Articles
Two Prototypes
I ended up prototyping two versions:
- One based on the “back cover removal” process
- One resembling a simple plastic hammer
Each will be introduced in separate entries.
What Counts as a “Custom Tool”
Let’s be clear: “custom tool” here means a glue stick jammed into a bit driver.
Both are untested prototypes, meant for gentle tapping only.
Durability is limited, and impact damage to the ratchet or joints is a real concern.
Still, the experience suggests potential—perhaps even for back cover removal.
A Note on Intent
This isn’t a recommendation.
It’s not a product.
It’s a method, recorded for the sake of structure.
The work is simple. The tools are auxiliary.
If you’re not particular, almost anything will do.
Even failure can be instructive.
Please proceed at your own risk.
Origin Story
No mechanical failure prompted this.
It all started with this tool:
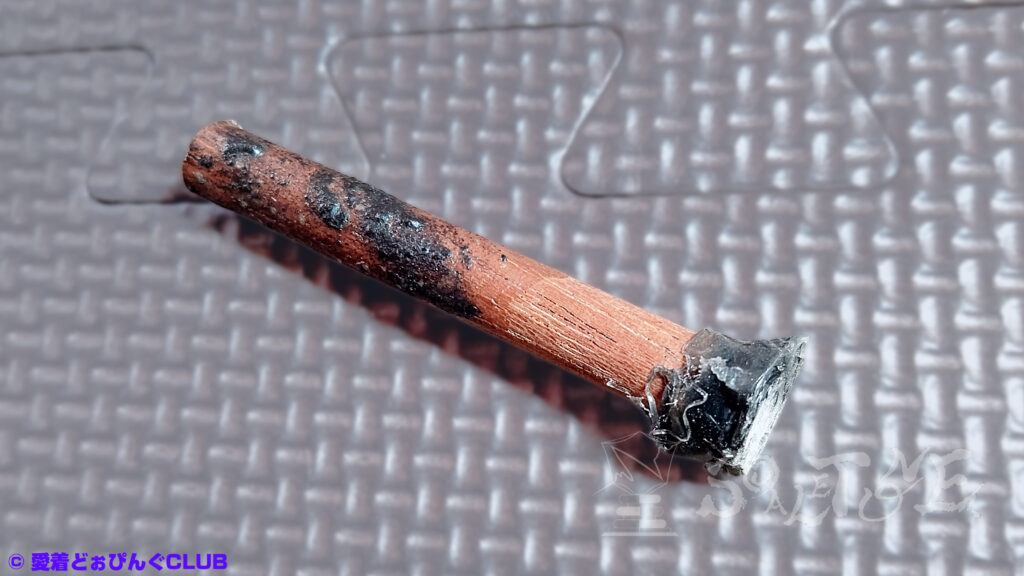
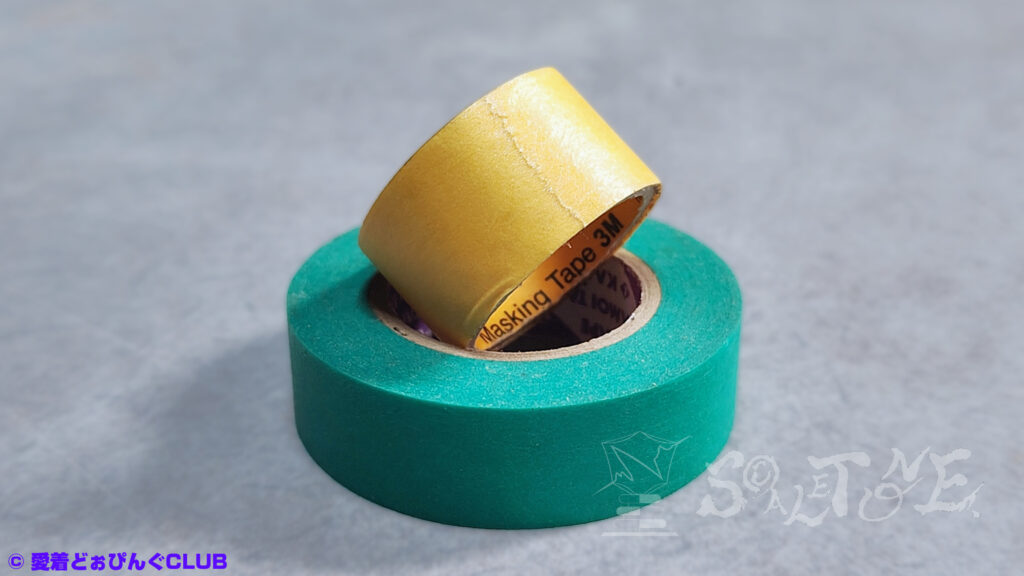
An 8mm mahogany dowel, if memory serves.
To be blunt, the photo just looked bad.
As a material, it’s softer than metal and arguably more suitable than what follows.
Even a metal rod can be used safely—if the end is flat and chamfered, and buffered with masking tape or rubber.
That should protect the case from scratches or plating damage.
I’m already losing track of what I’m saying, so let’s move on before the pen stops.
One of this site’s sub-themes is:
“Enjoying the useless. Uselessly enjoying.”
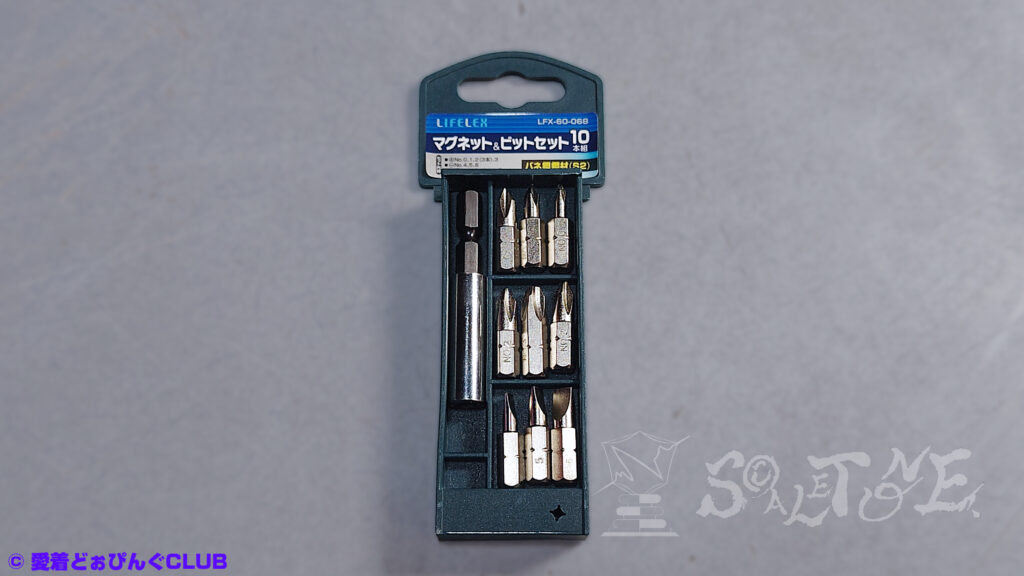
Version 1: Extended Back Cover Removal
This first article introduces the “Extended Back Cover Removal” version.
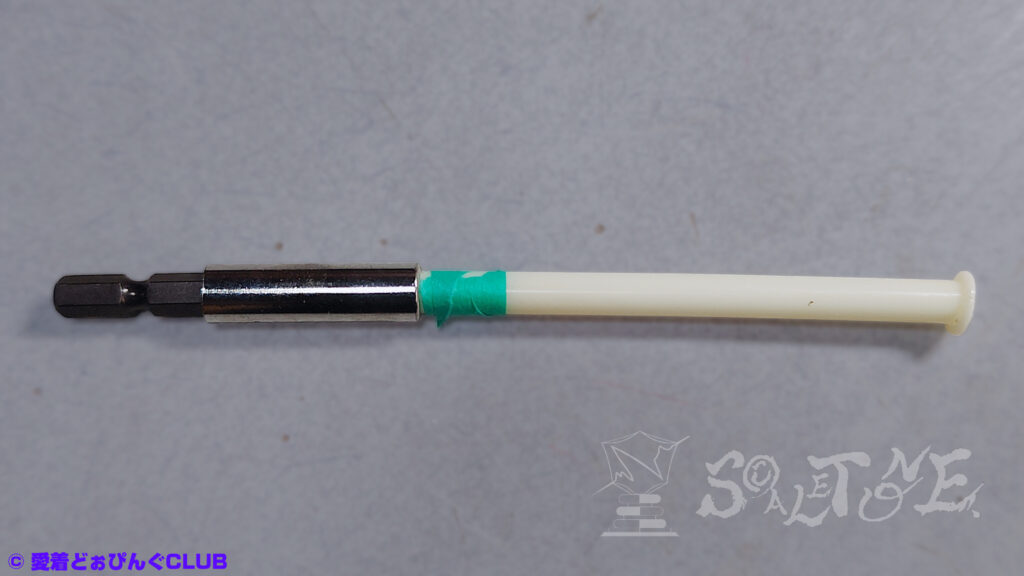
It consists of just two components:
- Glue stick (Φ7.5mm)
- Bit driver adapter (standard 6.35mm hex shaft)
Glue stick (Φ7.5mm)

Amazonでの検索結果:“グルースティック 7.5mm“
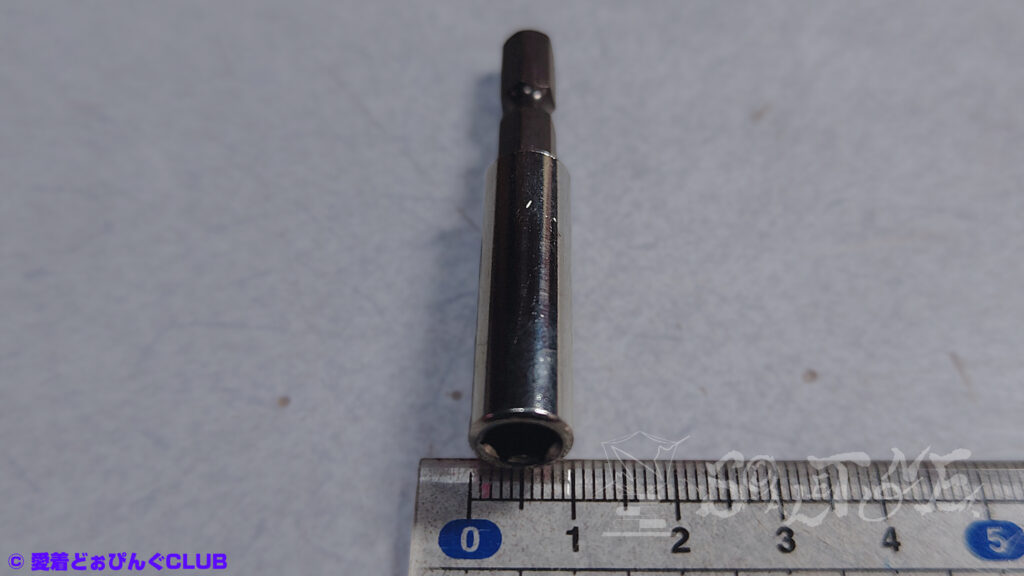
Bit driver adapter (standard 6.35mm hex shaft)
I used a shaft extension adapter.
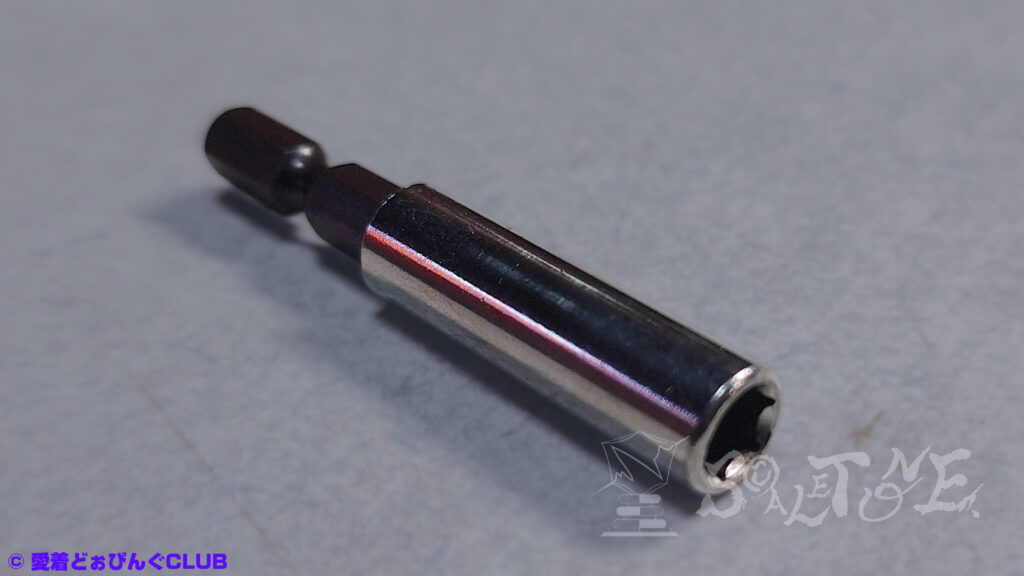
If you plan to strike it, the weak point is the joint between socket and shaft.
If both inner and outer diameters match, a standalone socket wrench might be better.
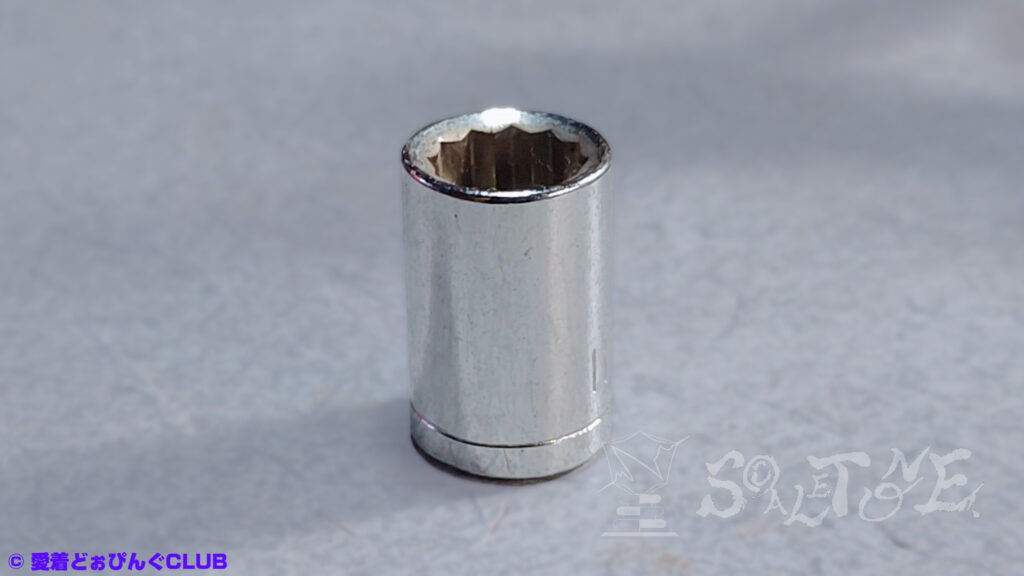
Ideally, the socket’s outer diameter should fall within the back cover’s perimeter.
From here on, I’ll refer to the adapter as the “socket.”
Amazonでの検索結果:“ドライバーセット“
Tools Used
All standard items:
- Torch lighter
- Utility knife
- Ruler
- Pen
- Masking tape
- Vise
Amazonで購入する:“マスキングテープ“
Amazonで購入する:“ボール盤バイス“
Step 0: Back Cover Removal (Hypothetical)
※ We’re not removing the back cover this time. Yes, again.
Start by cleaning the contact surface with neutral detergent or alcohol wipes.
If using a glue stick, it’s easier to apply it directly.
Melt the glue with a torch lighter and apply generously to cover the back cover.
Press vertically to ensure full contact.
※ Avoid direct flame contact.
If it works, great.
If not, you’ve still got a hammer.
Either way, it’s worth trying once.
Step 1: Molding
Let’s begin crafting the “dedicated plastic hammer.”
Attach the glue stick to the back cover.
Ideally, the melted glue should spread to the outer edge.
When heated, the glue softens and beads like wax.
That’s the sweet spot: good viscosity, strong adhesion.
Adjust flame distance and heating time.
You’ll get the feel for it after a few tries (and maybe a few burns).
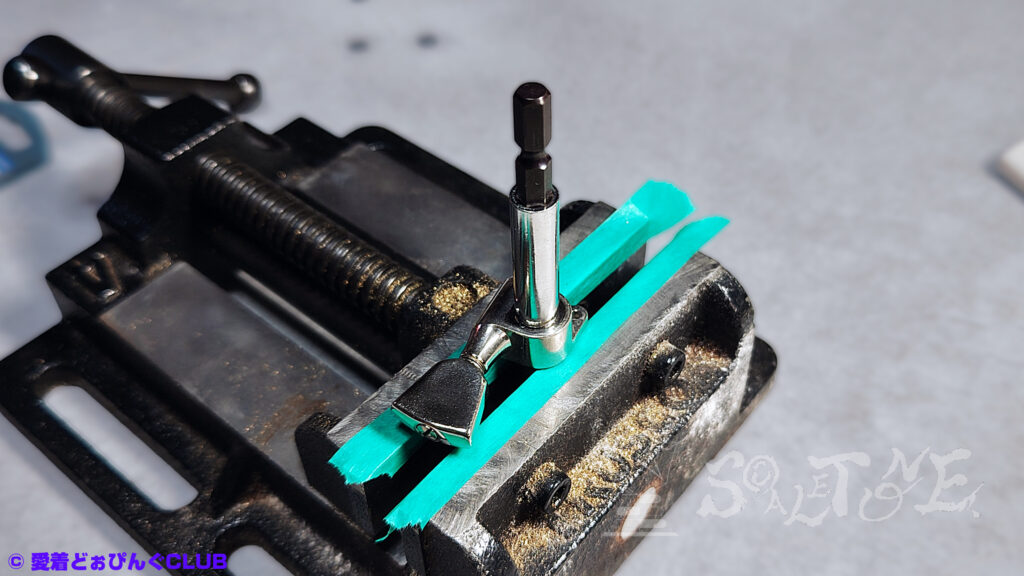
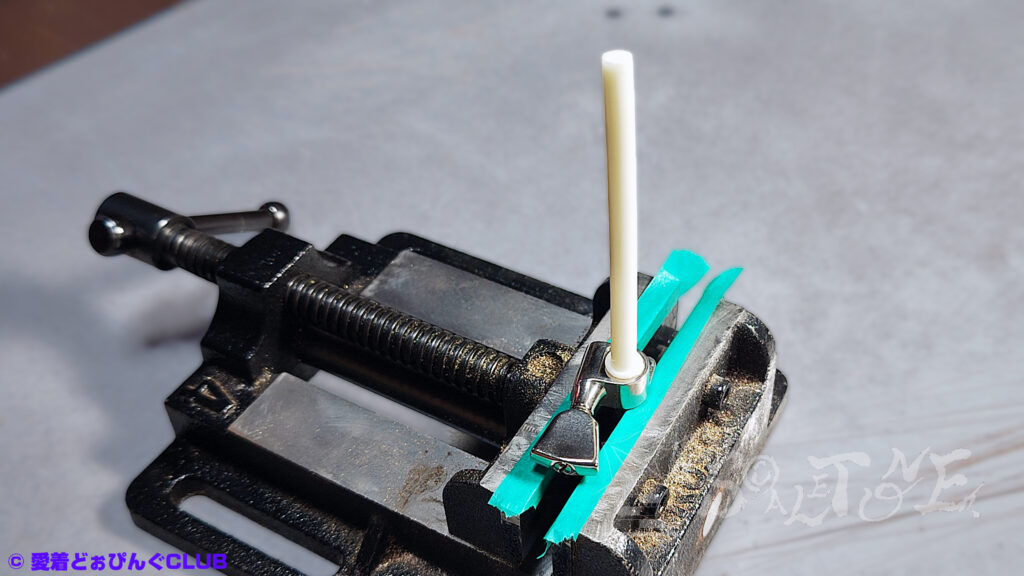
Step 2: Glue Stick + Socket
Insert the unmelted end of the glue stick into the socket.
If it slides in too easily, try the method in Part 2.
To measure depth, wrap masking tape around the insertion point.
You could use a pen, but why make a mess?
※Prototype Record of the Custom Tool
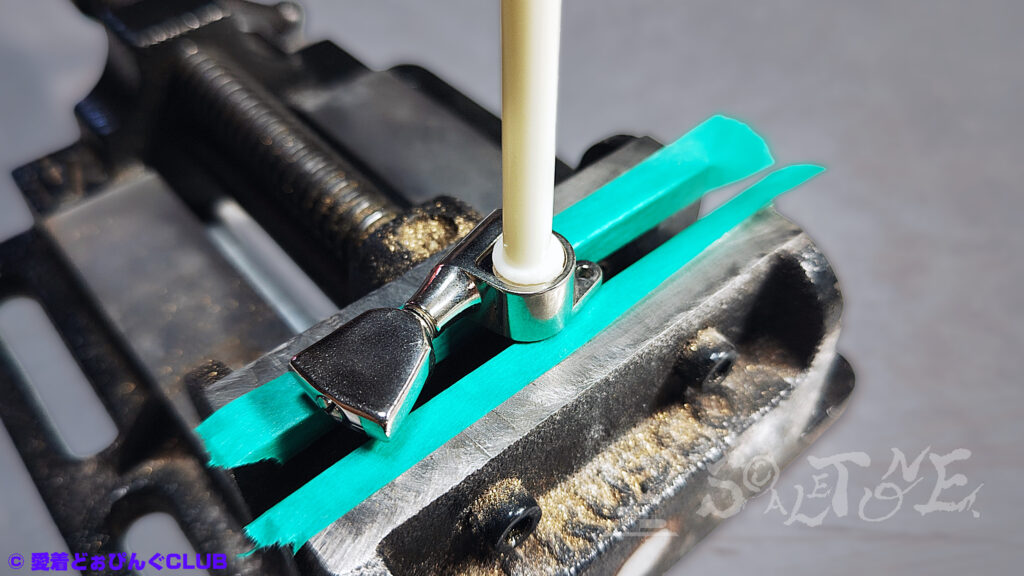
Step 3: Depth
Remove the glue stick and record the socket depth.
This one measured about 8mm.
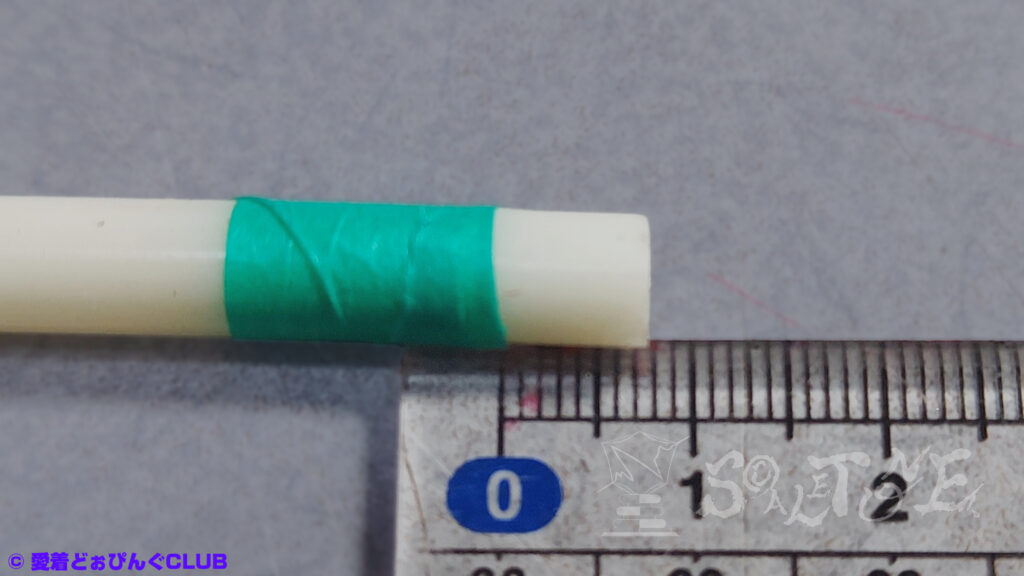
Probably the standard size.
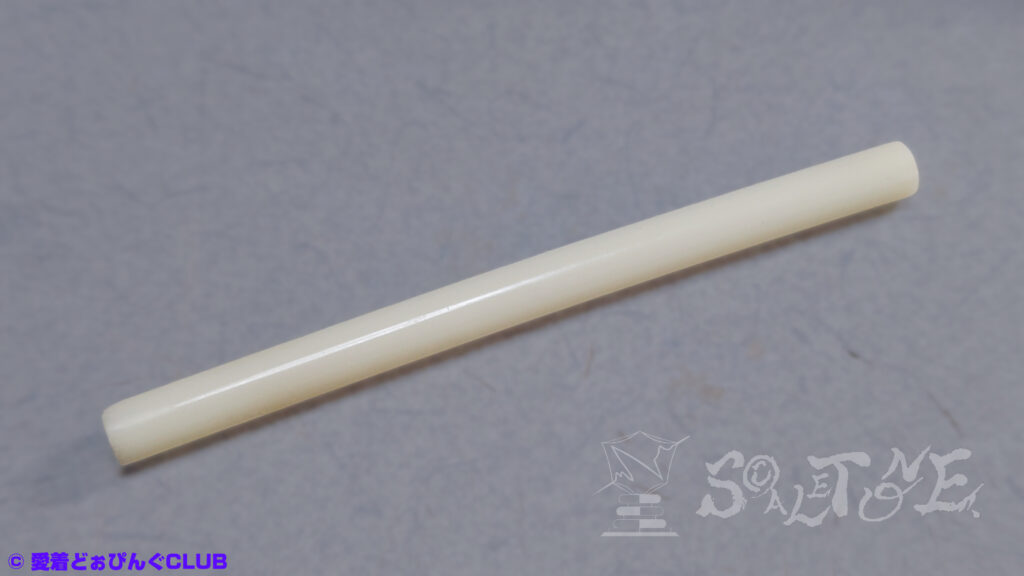
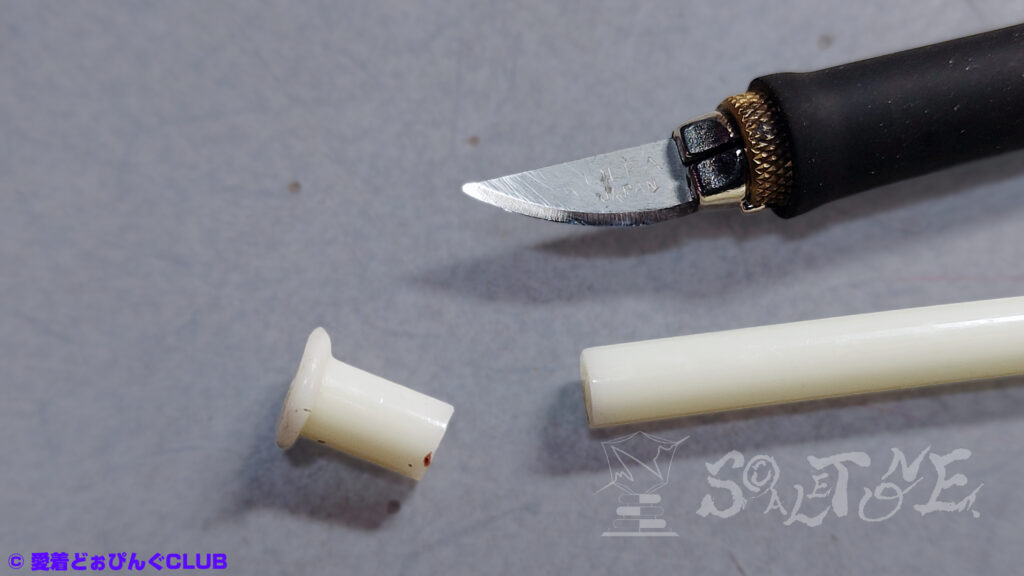
Step 4: Cutting Line
Now we trim the glue stick so the melted end becomes the striking surface.
Required length:
Socket depth (8mm) + Cushion section (impact buffer)
※ Too short: socket may hit the target
Too long: impact may cause wobble
Edges may tear under pressure

Since this is aesthetic, I added ~5mm for balance.
Final cut: 13mm from the tip.
Step 5: Cutting
To avoid distortion, find a stable surface.
Let the glue stick hang slightly off a cutting mat.
Hold the blade perpendicular and rotate slowly.
Apply even pressure. Avoid tilting.
If done well, the cut will meet itself naturally.
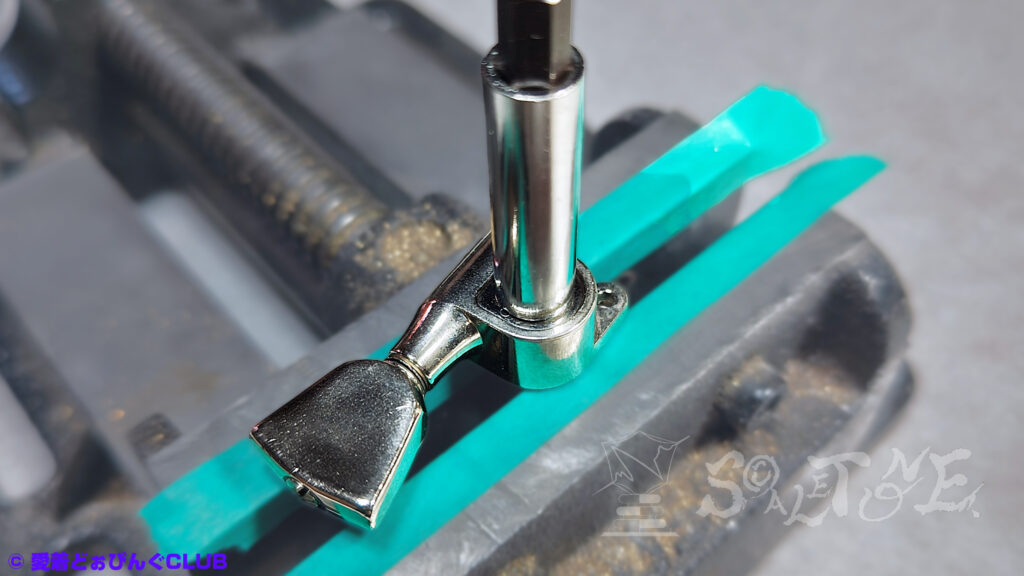
Step 6: Completion
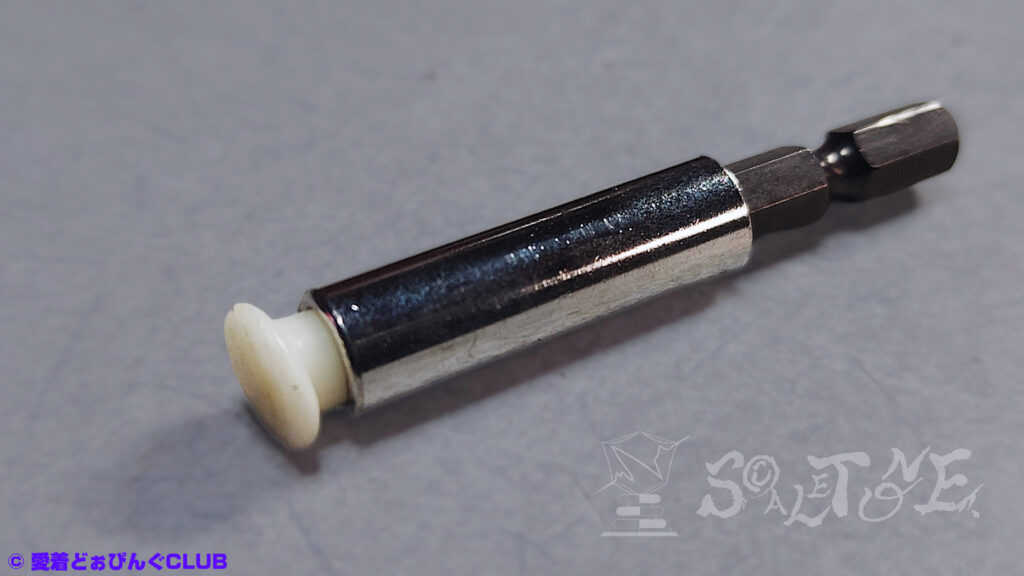
Insert the trimmed glue stick into the socket.
Done.
S©ALETONE’s Note: Final Thoughts
Thanks for reading.
While this version is flat, it may work even better on arched back covers like Grover tuners.
The impact could distribute force evenly.
Excess glue might act as a stopper, reducing stress and preserving shape.
In hindsight, maybe this “custom tool” wasn’t so pointless.
Even if the reason came after the fact.
Related Articles
Return to the 【Related Tools List】
※Prototype Record of the Custom Tool
※Reassembly Edition – Rotomatic Peg Complete Maintenance Guide